Menu Close Menu

3 comments
Reponsive Moniter, Tablet and Smart PhoneIn the last article we’ve seen the basic rules to create a simple layout for a website. After concentrating on the pc-desktop version, in this fourth part of the series, we’ll see which are the rules to apply to make the layout responsive.
So, the final result will become pleasant for both tablets and smartphones, as we’ll see in the final part. Screen resolution nowadays ranges from 320px (iPhone) to 2560px (large monitor) or even higher. Users no longer just browse the web with desktop computers. Users now use mobile phones, small notebooks, tablet devices such as iPad or Playbook to access the web. So the traditional fixed width design doesn't work any more. Web design needs to be adaptive. This tutorial will show you how to create a cross-browser responsive design with CSS3 media queries.

Another aspect of this technique where its simplicity really shines, is in how well its flat aesthetics translate so strongly on smaller screens (handhelds and mobile devices) without losing any of the impact they deliver. This is one way that it becomes so flexible.

As I introduced in the third article of the series, for the sake of clarity, we’ll use two style sheets for our website to keep different concepts separated; in relation with this topic, it’s good to remember that in production, you should use one of the available tools to minimize and merge the various CSS style sheets into a unique file to improve performances.

Now, let’s dive into the code and examine which are the most important changes that we have to apply to get our result.
First of all, we’ve to set the chosen breakpoints in our document. To do this, you have to put this line at the top of responsive.CSS: You can also see live demo our final project by click on live preview link below.


@media screen and (min-width: 800px) and (max-width: 1440px)

Now we are going to apply few rules to specify for this version.

@media screen and (min-width: 800px) and (max-width: 1440px) {
    #content-wrapper {
        border: none;
        margin: 0% auto;
        margin-top: 2%;
        padding: 1%;
        width: 80%;
        min-width: 700px;
        max-width: 1439px;
    }
    .box {
        background: #ffffff;
        padding: 2%;
        margin: 2% 0% 2% 2%;
        width: 43%;
        display: inline-block;
        vertical-align: top;
        border: 1px solid transparent;
    }
    .image-box {
        float: left;
        max-width: 40%;
        float: left;
        padding: 0px 2% 1% 0%;
    }
}

The rules to which you should pay more attention for this version are those applied to the header section. For the former, thanks to the rule max-width: 100%;the header will render at its native dimensions as long as its width doesn’t exceed the width of its container. Resizing your browser window, the header proportions will remain intact, even as the page scales down accordingly.

let’s have a look at the CSS media queries applied on all those devices whose min width 320 pixels. The first thing you’ll notice is that fonts and images have changed. For smaller screens, the first rule to remember is that everything has to be: clear, fast and understandable.

@media screen and (min-width: 320px) and (max-width: 799px) {
    #header {
        width: 100%;
        margin: 0%;
        text-align: center;
        padding: 2%;
        background: rgba(0,0,0,0.1);
        height: 50px;
    }
    #content-wrapper {
        border: none;
        margin: 1%;
        padding: 1%;
        min-width: 200px;
        width: 100%;
    }
    .box {
        background: #ffffff;
        width: 92%;
        padding: 2%;
        display: inline-block;
        vertical-align: top;
        border: 1px solid transparent;
        margin: 0 0 15px 0px;
    }
    .image-box {
        float: left;
        padding: 0% 2% 2% 0%;
        max-width: 100px;
    }
    h1 {
        text-align: center;
        font-size: 25px;
        letter-spacing: 0;
    }
}

This series about how to build a responsive, mobile-friendly website has ended. I hope you’ve enjoyed it!


If there is any advice that I can give to you, is to continue to “practice with this stuff”, not only in the practical realization of the website, but also in the design phase design phase which has a fundamental importance because it’s extremely important that everything is planned in detail; only in this case you’ll avoid waste of time and exhausting corrections, and you’ll perfectly understand how to organize your content and improve your final result. Thanks for reading our responsive series stay tuned for more useful stuff.
Read Article →

1 comments
social_mediaIcons set for you to use for your own projects and creations I have put together a set of social media logos and icons in vector. The set includes 64 logos/icons of my favorite networks and services. In today’s article, you will find 64 icon sets for a variety of purpose, all available for free. It’s quite a difficult task to find inspiration and fresh ideas while designing a new website, but perhaps these icon sets will be able to be a great source of ideas.

Circle_Anchor_Icons


We hope this great freebie bundle will help you to create stunning designs. If you have any questions, suggestions or just want to say “hello”, feel free to use a comment box below. Stay tuned for more updates.
Read Article →

0 comments
social_mediaSocial media icons are one of the essentials and nitty-gritties when it comes to talk about website or theme. They can be placed anywhere on your site either on header, footer or on the side bar. One thing which is kept in supreme focus while choosing right kind of social media icons is that they ought to be attention grabbing so any visitor’s consideration can be attained by them as they are like nuts and bolts of a website. What we have done for you today is to provide you with one great choice 15 Free Social Media Icons with amazing 3d design. All the icons can be downloaded for free and we’ve given you the resources to get them.

Social_media_icons_preview


Let us know what you think post your comment below in the comment form. And stay tuned for more updates.

Image Source:- Uknown
Read Article →

1 comments
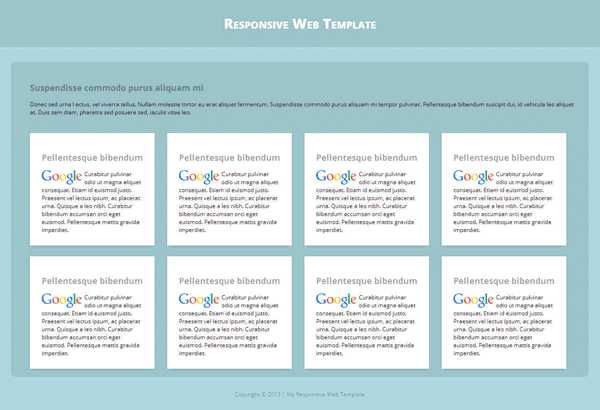
Reponsive Moniter, Tablet and Smart PhoneIn the Previous tutorial of this series, I’ve shown how to start building a website with the HTML code and its main elements. Now it’s time to introduce the first CSS rules in order to have a general idea of the graphic style that the homepage of our website will display, especially for the pc-desktop version. First of all, before having a look on the rules we have to apply in order to create a particular design for our homepage, let’s see how it will appear in our browser window (my default browser is Chrome but, with the application of some specific rules, you’ll be able to obtain the same result for all modern web-browsers). The homepage of our totally customizable website should look more or less as following:

final_project_preview

For the content section, let’s create a main div whose ID is “content-wrapper”, a wrapper div, and put an product or article within it. We just put lorem ipsum text in the article as text.  We just add a content wrapper element look like this:

<div id="content-wrapper">
put your website content here
</div>

and our final html structure code look like this:

<!DOCTYPE HTML>
<html lang=”en”>
<head>
<meta charset=utf-8" />
<meta name="viewport" content="width=device-width">
<title>Fluid Responsive Template</title>
</head>
<body>
<header>
<div id="header">
<h1>Responsive Template</h1>
</div>
</header>
<div id="content-wrapper">
<h2>Suspendisse commodo purus aliquam mi</h2>
        <p>Donec sed urna l ectus, vel viverra tellus. Nullam molestie tortor eu erat aliquet fermentum. Suspendisse commodo purus aliquam mi tempor pulvinar.  Pellentesque bibendum suscipit dui, id vehicula leo aliquet at. Duis sem diam, pharetra sed posuere sed, iaculis vitae leo.</p>
        
        <div class="box"><h2>Pellentesque bibendum</h2><img class="image-box" src="https://www.google.com.pk/images/srpr/logo11w.png" />Curabitur pulvinar odio ut magna aliquet consequat. Etiam id euismod justo. Praesent vel lectus ipsum, ac placerat urna. Quisque a leo nibh.  Curabitur bibendum accumsan orci eget euismod. Pellentesque mattis gravida imperdiet.</div> 
        <div class="box"><h2>Pellentesque bibendum</h2><img class="image-box" src="https://www.google.com.pk/images/srpr/logo11w.png" />Curabitur pulvinar odio ut magna aliquet consequat. Etiam id euismod justo. Praesent vel lectus ipsum, ac placerat urna. Quisque a leo nibh.  Curabitur bibendum accumsan orci eget euismod. Pellentesque mattis gravida imperdiet.</div>
        <div class="box"><h2>Pellentesque bibendum</h2><img class="image-box" src="https://www.google.com.pk/images/srpr/logo11w.png" />Curabitur pulvinar odio ut magna aliquet consequat. Etiam id euismod justo. Praesent vel lectus ipsum, ac placerat urna. Quisque a leo nibh.  Curabitur bibendum accumsan orci eget euismod. Pellentesque mattis gravida imperdiet. </div>
        <div class="box"><h2>Pellentesque bibendum</h2><img class="image-box" src="https://www.google.com.pk/images/srpr/logo11w.png" />Curabitur pulvinar odio ut magna aliquet consequat. Etiam id euismod justo. Praesent vel lectus ipsum, ac placerat urna. Quisque a leo nibh.  Curabitur bibendum accumsan orci eget euismod. Pellentesque mattis gravida imperdiet.</div>
<br style="clear:both" />
</div>

</body>
</html>

We’ll proceed step-by-step from the upper part of our layout to the bottom. The code for the very first part (which includes the elements of header). The first one is the banner element, with this code for styling:

#header {
margin:0%;
text-align: left;
padding:2%;
background: rgba(0,0,0,0.1);
height:50px;
   
}
#header h1 {
font-size: 40px;
font-variant:small-caps;
font-weight: bold;
color: #fff;
line-height: 50px;
margin:0% 0% 0% 0%;
padding:0%;
}

These first rules simple enough to understand. To space the header from the top of the browser window we’re applying a margin of 0% and to let our header cover all the width of our browser’s window, we’ve set the corresponding rule with a percentage of 100.

Now let’s create CSS for the content-wrapper section:

#content-wrapper {
margin:1%;
padding:2%;
background: rgba(0,0,0,0.1);
border-radius: 5px;
-moz-border-radius: 5px;
-webkit-border-radius: 5px;
-ms-border-radius: 5px;
box-shadow: 0 10px 7px -7px rgba(0,0,0,0.12), 0 0 4px rgba(0,0,0,0.1);
}
.box {
  background: #ffffff;
  padding: 2%;
  margin: 2% 0% 0% 2%;
  width: 18%;
  display: inline-block;
  vertical-align: top;
  border: 1px solid transparent;
  box-shadow: 0 10px 7px -7px rgba(0,0,0,0.12), 0 0 4px rgba(0,0,0,0.1);
}
.image-box {
  max-width: 40%;
  float: left;
  padding: 0px 2% 1% 0%;
}

I won’t explain the rules one by one as for the first part, especially because they are almost all the same. The only thing to which I’d like you’d attention is the box shadow property.
This property allows designers to easily implement multiple drop shadows (outer or inner) on box elements, specifying values for color, size, blur and offset.

Let’s move on to the general part, that is on the rules applied to elements such as heading, paragraphs, images, boxes appearance and so on. Here is the code with the specifications of the rules for the layout.

body {
color: #111;
background: #71BBC8;
font-family:Verdana, Geneva, sans-serif;
font-size:100%;
padding: 0em;
margin: 0em;
  }

a {
color: rgba(0,0,0,0.4);
text-decoration: none;
outline: none;
}
a:hover {
cursor:pointer;
}
a:focus {
outline:none;
}
img,object,embed {
max-width:100%;
height:auto;
}
 
object,embed {
height:100%
}
 
img{
-ms-interpolation-mode:bicubic;
}
p {
   margin-top: 0;
   margin-bottom: 0.5em;
}
h1, h2, h3 {
   text-align: left;
}

Let’s start the adding footer section in your template.

    <footer id="footer">Copyright &copy; 2013 | My Responsive Web Template</footer>

Now our HTML code look like this:

<!DOCTYPE HTML>
<html lang=”en”>
<head>
<meta charset=utf-8" />
<meta name="viewport" content="width=device-width">
<title>Fluid Responsive Template</title>
</head>
<body>
<header>
<div id="header">
<h1>Responsive Template</h1>
</div>
</header>
<div id="content-wrapper">
<div class="box"><h2>Pellentesque bibendum</h2><img class="image-box" src="https://www.google.com.pk/images/srpr/logo11w.png" />Curabitur pulvinar odio ut magna aliquet consequat. Etiam id euismod justo. Praesent vel lectus ipsum, ac placerat urna. Quisque a leo nibh.  Curabitur bibendum accumsan orci eget euismod. Pellentesque mattis gravida imperdiet.</div> 
        <div class="box"><h2>Pellentesque bibendum</h2><img class="image-box" src="https://www.google.com.pk/images/srpr/logo11w.png" />Curabitur pulvinar odio ut magna aliquet consequat. Etiam id euismod justo. Praesent vel lectus ipsum, ac placerat urna. Quisque a leo nibh.  Curabitur bibendum accumsan orci eget euismod. Pellentesque mattis gravida imperdiet.</div>
        <div class="box"><h2>Pellentesque bibendum</h2><img class="image-box" src="https://www.google.com.pk/images/srpr/logo11w.png" />Curabitur pulvinar odio ut magna aliquet consequat. Etiam id euismod justo. Praesent vel lectus ipsum, ac placerat urna. Quisque a leo nibh.  Curabitur bibendum accumsan orci eget euismod. Pellentesque mattis gravida imperdiet. </div>
        <div class="box"><h2>Pellentesque bibendum</h2><img class="image-box" src="https://www.google.com.pk/images/srpr/logo11w.png" />Curabitur pulvinar odio ut magna aliquet consequat. Etiam id euismod justo. Praesent vel lectus ipsum, ac placerat urna. Quisque a leo nibh.  Curabitur bibendum accumsan orci eget euismod. Pellentesque mattis gravida imperdiet.</div>
</div>
<br style="clear:both" />
</div>
<footer id="footer">Copyright &copy; 2013 |Responsive Template</footer>
</body>
</html>

and CSS Code should look like this:

body {
color: #111;
background: #71BBC8;
font-family:Verdana, Geneva, sans-serif;
font-size:100%;
padding: 0%;
margin: 0%;
 
}
a {
color: rgba(0,0,0,0.4);
text-decoration: none;
outline: none;
}
a:hover {
cursor:pointer;
 
}
a:focus {
outline:none;
 
}
p {
   margin-top: 0;
   margin-bottom: 1%;
}
img,object,embed {
max-width:100%;
height:auto;
 
}
 
object,embed {
height:100%
 
}
 
img{
-ms-interpolation-mode:bicubic;
 
}
 
#header {
margin:0% auto;
text-align: left;
padding:2%;
background: rgba(0,0,0,0.1);
height:50px;
   
}
#header h1 {
font-size: 40px;
font-variant:small-caps;
font-weight: bold;
color: #fff;
line-height: 50px;
margin:0% auto;
padding:0%;
 
}
 
#content-wrapper {
margin:2%; padding:2%;
background: rgba(0,0,0,0.1);
border-radius: 5px;
-moz-border-radius: 5px;
-webkit-border-radius: 5px;
-ms-border-radius: 5px;
box-shadow: 0 10px 7px -7px rgba(0,0,0,0.12), 0 0 4px rgba(0,0,0,0.1);
 
}
 
#footer{
clear: both;
margin:1%;
padding:1%;
background-color:none;
color: rgba(0,0,0,0.4);
text-align: center;
height:20px;
line-height: 20px;
 
}
.box {
  background: #ffffff;
  padding: 2%;
  margin: 2% 0% 0% 2%;
  width: 18%;
  display: inline-block;
  vertical-align: top;
  border: 1px solid transparent;
  box-shadow: 0 10px 7px -7px rgba(0,0,0,0.12), 0 0 4px rgba(0,0,0,0.1);
}
.image-box {
  max-width: 40%;
  float: left;
  padding: 0px 2% 1% 0%;
}

This is it! now template is ready with general styling, above full code and working example – all in the demo:


I’m not much of a designer but I will do my best to make this look amazing.
In this article we’ve seen the basic rules to create a simple layout for a website. After concentrating on the pc-desktop version, in the next article we’ll see which are the rules to apply to make this layout responsive.
Read Article →

3 comments
Reponsive Moniter, Tablet and Smart PhoneIn the first article of this brand new series, I have introduced the main objectives of the series and given a short but complete introduction on the critical components of media queries and responsive breakpoints. Now, it’s time to begin doing some practical work. As I have mentioned before, I’ll start with the planning and creation of a mockup for each of the three main device types on which our responsive website will be designed, tested, and displayed: PC desktops, tablets, and mobile phones. Returning to our files, the first, called Style.css, is the one which contains all the common CSS rules. The second one called responsive.css contains the specifications of the rules to apply to the chosen devices.

HTML can be edited by using a professional HTML editor like:
  • Adobe Dreamweaver
  • Microsoft Expression Web
  • Coffee Cup HTML Editor

First Step: HTML code

The first step in creating a Responsive template is to add the code for the header, body, and footer.Let’s begin building the structure of our website through the use of HTML code. To avoid confusion and miss some steps, we’ll proceed by dividing the layout into three parts. Now, what we have to do as our first task is declare the type document that for HTML5 is indicated in the following way:

<!DOCTYPE html>

The next item we have to pay attention to is the viewport property. Setting a viewport tells the browser how content should fit on the device’s screen and informs the browser that the site is optimized for mobile. For example…

<meta name="viewport" content="width=device-width">

Tells the browser to set the viewport to the width of the device with an initial scale of 1. After this, we insert into the title tag the name we’ve chosen for our website. Finally, we have to link our HTML page to the CSS stylesheets that we’ll use to define the style of our homepage; the HTML “link” element specifies relationships between the current document and other documents. With this line of code…

<link rel="stylesheet" href="css/style.css" type="text/css" />

We link the document to the common stylesheet (that is, the document which contains all the common CSS rules that will be shared by the three versions of the project), while this one…

<link rel="stylesheet" href="css/responsive.css" type="text/css" />

Recalls to the file where there are the specifications of the particular rules that will be applied only to that particular device indicated. Please note that since we’re using HTML5, you don’t actually need to specify type="text/css".

Now Close the head tag and come on to the body section.  Your final code look like this:
<!DOCTYPE HTML>
<html>
<head>
<meta charset=utf-8" />
<meta name="viewport" content="width=device-width">
<title>Fluid Responsive Template</title>
</head>
<body>
<header>
<div id="header">
<h1>Responsive Template</h1>
</div>
</header>
</body>
</htm>

You will now have a page with no styles just HTML Webpage Structure. Now we need to create the CSS files and content for the Template. The Next tutorial will explain how to add the styles to the stylesheets and contents  for your Responsive Template.
Read Article →

0 comments
html5-css3-navigation-menu
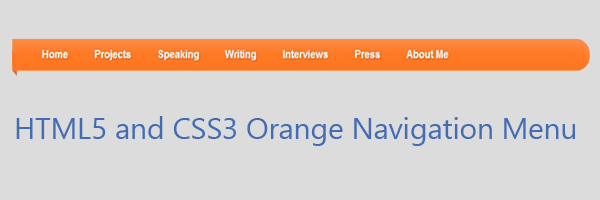
In this tutorial, we’ll take a look and see what we can achieve with HTML5 and CSS3. HTML5 brings to the spec a dedicated <nav> element that should be used as the container for any major navigation structure, such as the main vertical or horizontal site navigation menus, or an in-page table of contents for example. IE unfortunately doesn’t support this new element yet, but there is a simple fix we can use, of which I’m sure you’re all aware.


How to add it to blogger blog

1. Go to Layout > Add A Gadget and select HTML/JavaScript gadget.
2. Copy the HTML link and paste it inside the content box.
<style>
#org_menu {
    position: relative;
    margin: 0 auto;
    clear: both;
    width: 960px;
    }
#org_menu:before {
    content: "";
    position: absolute;
    left: -10px;
    bottom: -9px;
    z-index: 1;
    border: 10px solid transparent;
    border-right-color: #c50;
}
#org_menu ul {
    display: block;
    position: relative;
    z-index: 2;
    padding: .2em 30px;
    margin-right: -2em;
    list-style: none;
    background: #f72;
    font-family: 'Arial', serif;
    font-weight:bold;
    font-size: 16px;
    line-height: 1;
    color: white;
    text-transform: capitalize;
    border-radius: 0 9999px 9999px 0;
    box-shadow: 0 2px 8px -3px rgba(0,0,0,.5),
                0 1.4em 2em -0.7em rgba(255, 255, 255, .2) inset;;
}
#org_menu ul:after {
    content: "";
    clear: both;
    display: block;
    visibility: hidden;
}
    #org_menu li {
        float: left;
        position: relative;
    }
   
        #org_menu a {
            display: block;
            padding: .8em 1.4em;
            text-decoration: none;
            text-shadow: 1px 1px 1px rgba(0,0,0,.3);
            color: white;
            transition:.3s box-shadow, .3s padding;
            border-radius: 9999px;
        }
       
        #org_menu a:hover,
        #org_menu a:active {
            background: rgba(0,0,0,.1);
            color: #F90;
            box-shadow: 1px 1px 5px rgba(0,0,0,.3) inset;
        }
       
        #org_menu a:active {
            background:white;
            color: #eee;
            padding: .5em .6em .3em 1em;
            text-shadow: 1px 1px 0 rgba(0,0,0,.4);
            box-shadow: 10px 6px 1px #c50 inset;
        }
    #org_menu:hover {
        transform: rotate(720deg);
    }
</style>

<nav id="org_menu">
<ul>
<li ><a href="#" title="Home">Home</a></li>
<li><a href="#">Projects</a></li>
<li><a href="#">Speaking</a></li>
<li><a href="#">Writing</a></li>
<li><a href="#">Interviews</a></li>
<li><a href="#">Press</a></li>
<li><a href="#">About me</a></li>
</ul>
</nav>

To rename the category, simply replace Home with your own text. As for the link, just replace  # with the Page intended URL. Hope you enjoyed with this tutorial, don’t forget to tell thanks and leave a comment :) Enjoy..!!
Read Article →

3 comments
html5-css3-navigation-menu
Today in this article we are showing you a pure CSS3 menu, no images or JavaScript used. Here are used  two CSS files.
RESET.CSS – Many browser interpret the default behavior of html elements differently. By using a general reset CSS file, we can work round this. This file also contains some general styling, such as anchor tag colors, font-sizes, etc. Keep in mind, that these values might be overridden somewhere else in the file.
STYLE.CSS – This file contains all of the specific styling's for the menu.


How to add it to blogger blog

1. Go to your Blogger Dashboard>> Template and paste the following html5 reset style sheet link before closing your <head> tag.
<link href="https://dl.dropboxusercontent.com/u/223738947/html5-reset.css" type="text/css" rel="stylesheet">

2. Go to Layout > Add A Gadget and select HTML/JavaScript gadget.
3. Copy the HTML link and paste it inside the content box.

<style>
#nav_menu {
    width: 100%;
    margin: 10px;   
    font-family: Arial, sans-serif;
    font-size: 12px;
    font-weight: bold;
    margin-right: auto;
    margin-left: auto;
    text-transform: capitalize;
       
}
#nav_menu ul {   
    float: auto;
    overflow: hidden;
    margin:0 auto;
    text-align: center;
   
}
#nav_menu:after {
    clear: both;
    content: ".";
    display: block;
    height: 0;
    visibility: hidden;
}

#nav_menu a {
    display:block;
    padding: 10px 30px;
    color: #fff;
    margin: 0 auto;
    text-decoration: none;
    text-shadow: 0 1px #333;
    text-align:center;
}
#nav_menu a:hover {
    color: #FFF;
    text-shadow: 0 2px #000;
}
#nav_menu li {
    text-align: center;
    display: inline-block;
    margin: 0 auto;
    border-style: solid;
    border-width: 1px;
    border-color: #005fa1 #005fa1 #005fa1 #005fa1;
    background: #0096ff; /* Old browsers */
    background: -moz-linear-gradient(top, #0096ff 0%, #006bb6 100%); /* FF3.6+ */
    background: -webkit-gradient(linear, left top, left bottom, color-stop(0%,#0096ff), color-stop(100%,#006bb6)); /* Chrome,Safari4+ */
    background: -webkit-linear-gradient(top, #0096ff 0%,#006bb6 100%); /* Chrome10+,Safari5.1+ */
    background: -o-linear-gradient(top, #0096ff 0%,#006bb6 100%); /* Opera 11.10+ */
    background: -ms-linear-gradient(top, #0096ff 0%,#006bb6 100%); /* IE10+ */
    background: linear-gradient(top, #0096ff 0%,#006bb6 100%); /* W3C */
    filter: progid:DXImageTransform.Microsoft.gradient( startColorstr='#0096ff', endColorstr='#006bb6',GradientType=0 ); /* IE6-9 */   
}
#nav_menu li:hover {
   
    background: #404040; /* Old browsers */
    background: -moz-linear-gradient(top, #404040 0%, #252525 100%); /* FF3.6+ */
    background: -webkit-gradient(linear, left top, left bottom, color-stop(0%,##404040), color-stop(100%,#252525)); /* Chrome,Safari4+ */
    background: -webkit-linear-gradient(top, ##404040 0%,#252525 100%); /* Chrome10+,Safari5.1+ */
    background: -o-linear-gradient(top, #404040 0%,#252525 100%); /* Opera 11.10+ */
    background: -ms-linear-gradient(top, #404040 0%,#252525 100%); /* IE10+ */
    background: linear-gradient(top, #404040 0%,#252525 100%); /* W3C */
    filter: progid:DXImageTransform.Microsoft.gradient( startColorstr='#404040', endColorstr='#252525',GradientType=0 ); /* IE6-9 */
border-color: #252525;
}
#nav_menu li:first-child {
    border-color: none;
    border-radius: 100px 0 0 100px;
}
#nav_menu li:last-child {
    border-color: none;
    border-radius: 0 100px 100px 0;
}
#nav_menu li:first-child a:hover {
border-color: #252525;
}
</style>
    <!-- begin navigation -->
    <nav id="nav_menu">
            <ul>
            <li><a href="#">Home</a></li>
            <li><a href="#">Services</a></li>
               <li><a href="#">Products</a></li>
            <li><a href="#">Portfolio</a></li>
            <li><a href="#">About</a></li>
            <li><a href="#">Blog</a></li>
            <li><a href="#">Faqs</a></li>
            <li><a href="#">Contact</a></li>
        </ul>
       
    </nav>
  <!-- end navigation -->
   

I have ran tests on both Mac and Windows versions of the latest Chrome, Safari, Firefox. Worked everywhere as it should.
To rename the category, simply replace Home with your own text. As for the link, just replace  # with the Page intended URL. Hope you enjoyed with this tutorial, don’t forget to tell thanks and leave a comment :) Enjoy..!!
Read Article →

2 comments

Responsive_Flat_Navigation_menu

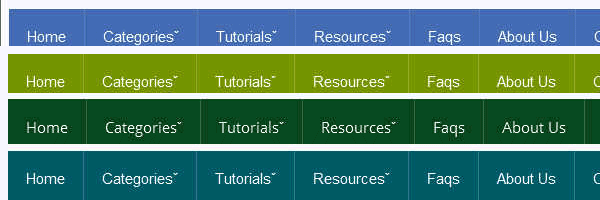
Mostly we discuss regarding responsive web design in our blogger related tutorials. Do you wish to make your own responsive menu for your website, but don't know how ? during this tutorial we'll show you 4 awesome responsive menus that will be very useful to build your own website navigation.  For straightforward navigation, the solutions is straight-forward, However, if you’re performing on something a bit more complex, perhaps with multiple lists and dropdowns, a additional dramatic arranging is also so as. during this approach to responsive navigation, we’re reaching to use associate approach that may accommodate large, multi-level navigation menus using media queries, while making an attempt to stay with our easy markup and our external resources minimal, In this article you will see how you can build an amazing CSS3 animated responsive dropdown menu.


Live Preview       Download Source


Creating Responsive Nested Navigation Menu

Firstly, simple markup of multi-leveled unordered lists with a little bit of HTML5 flavor. My example consists of three levels. Three is not the limit, you may have infinite levels on your next super project.


Step 1. Creating HTML Structure

<div class="nav-container">
              <div>
              <label class="responsive_menu" for="responsive_menu">
              <span>Menu</span>
              </label>
              <input id="responsive_menu" type="checkbox">
              <ul class="menu">
              <li><a href="#">Home</a></li>
              <li class="dropdown"><a href="#">Categoriesˇ</a>
                <ul>
                  <li><a href="#">SEO</a></li>
                  <li><a href="#">Webmaster Tools</a></li>
                  <li><a href="#">Google News</a></li>
                  <li class="dropdown"><a href="#">Web Design ›</a>    
                    <ul>
                      <li><a href="#">Social Plugin</a></li>
                      <li><a href="#">Plugins</a></li>
                      <li class="dropdown"><a href="#">Templates ›</a>
                        <ul>
                          <li><a href="#">Blogger</a></li>
                          <li><a href="#">WordPress</a></li>
                          <li><a href="#">Jomla</a></li>
                          <li><a href="#">Website Template</a></li>
                        </ul>
                      </li>
                    </ul>
                  </li>
                 
                </ul>
              </li>
              <li class="dropdown">
              <a href="#">Tutorialsˇ</a>
              <div class="columndrop">
                <div class="col">
                  <h3>± SEO</h3>
                  <ul>
                    <li><a href="#">Basic</a></li>
                    <li><a href="#">Off Page</a></li>
                    <li><a href="#">On Page</a></li>
                    <li><a href="#">Blogger SEO</a></li>
                  </ul>
                </div>
                <div class="col">
                  <h3>± Navigation</h3>
                  <ul>
                    <li><a href="#">Website Menu</a></li>
                    <li><a href="#">Blogger Menu</a></li>
                    <li><a href="#">Wordpress Menu</a></li>
                    <li><a href="#">All in One</a></li>
                  </ul>
                </div>
                <div class="col">
                  <h3>± Plugins</h3>
                  <ul>
                    <li><a href="#">Social</a></li>
                    <li><a href="#">Blogger</a></li>
                    <li><a href="#">Wordpress</a></li>
                    <li><a href="#">Website</a></li>
                  </ul>
                </div>
              </div>
              </li>
              <li class="dropdown"><a href="#">Resourcesˇ</a>
              <div class="megadrop">
                <div class="col">
                  <h3>Graphic</h3>
                  <ul>
                    <li><a href="#">Illustrator</a></li>
                    <li><a href="#">CorelDraw Styles</a></li>
                    <li><a href="#">Adobe Plugin</a></li>
                   
                  </ul>
                </div>
                <div class="col">
                  <h3>Vector Graphic</h3>
                  <ul>
                    <li><a href="#">Vectors</a></li>
                    <li><a href="#">Icons</a></li>
                    <li><a href="#">UI Kit</a></li>
                   
                  </ul>
                </div>
                <div class="col">
                  <h3>Template</h3>
                  <ul>
                    <li><a href="#">HTML Templates</a></li>
                    <li><a href="#">Wordpress Themes</a></li>
                    <li><a href="#">Blogger Templates</a></li>
                   
                  </ul>
                </div>
                <div class="col">
                  <h3>Social Media</h3>
                  <ul>
                    <li><a href="#">Social Plugin</a></li>
                    <li><a href="#">Social Icons</a></li>
                    <li><a href="#">Social Vector Icons</a></li>
                   
                  </ul>
                </div>
               </div>
              </li>
              <li><a href="#">Faqs</a></li>
              <li><a href="#">About Us</a></li>
              <li><a href="#">Contact Us</a></li>
              </li>
          </ul>
        </div>
      </div>


Now let's just give a sense to the HTML above with the CSS below.


Step 2. Let’s add some very basic styling to get our list looking like a navigation bar:


.menu-container {
    width:100%;
    margin: 0 auto;
    padding: 20px 0;
}

.menu {
    font-family: 'Open Sans', sans-serif;
    font-weight: 400;
    font-size: 15px;
    line-height: 15px;
    position: relative;
    padding: 0 0 0 4px;
    margin: 0;
    background-color: #005b68;
}

/* Reset Links */
.menu a, .menu a:link, .menu a:visited, .menu a:focus, span {
    color: #fff;
    text-decoration: none;
}

.menu a:hover {
color: #c4c4c4;
text-decoration: none;
}

/* Main element */
.menu > li {
    display: inline-block;
    text-align: center;
    margin-left: -4px;
    border-left: 1px solid rgba(255, 255, 255, 0.2);
    box-shadow: -1px 0 0 rgba(255, 255, 255, 0.2);
   
    }

/* Link Style */
.menu > li > a {
    padding:20px 18px;
    display: block;
}

.menu > li:hover > a{
    color: #005b68;
}

.menu > li:hover {
    background-color: #fff;
}
.menu > li:first-child {
border-left: none;
box-shadow: none;
}


Step 3. Next, let’s get the horizontal dropdown menus happening. While this could be done with pure CSS using the:hover .


/* Simple multilevel dropdown */
.menu > li > ul {
    opacity: 0;
    visibility: hidden;
    position: absolute;
    list-style: none;
    top:55px;
    background-color: #005b68;
    width: 200px;
    text-align: left;
    margin-top:30px;
    padding: 0px;
    z-index: 99;
}

/* First level appear */
.menu > li:hover > ul {
    opacity: 1;
    visibility: visible;
    margin-top: 0px;
}

/* Style for dropdown links */
.menu li > ul li {
    font-size: 13px;
    position: relative;
    display: block;
    padding: 15px 10px;
   
}

.menu > li > ul  li:hover {
    background-color: #fff;

}

.menu ul  li:hover > a {
    color: #005b68;
}

/* Second and third dropdown level */
.menu > li > ul li ul {
    opacity: 0;
    visibility: hidden;
    position: absolute;
    list-style: none;
    top:0px;
    left: 200px;
    background-color: #005b68;
    width: 200px;
    text-align: left;
    padding: 0px;
    margin-left: 30px;
}

.menu > li > ul li ul li:hover {
    background-color: #fff;
}
input#responsive_menu { display: none; }

.menu > li > ul li ul li ul {
    background-color: #005b68;
}

.menu > li > ul li ul li ul li:hover {
    background-color: #fff;
}

/* Second and third level appears */
.menu > li ul li:hover > ul {
    opacity: 1;
    visibility: visible;
    margin-left: 0px;
}


We’ve just floated our list items into a horizontal line, set some colors up and hidden the submenus off the screen using absolute positioning….!!!


Step 4. Here is we are going to stylize our column dropdown and mega dropdown list.


/* columndrop dropdown */
.menu .columndrop {
    opacity: 0;
    visibility: hidden;
    position: absolute;
    list-style: none;
    top:55px;
    background-color: #005b68;
    min-height: 100px;
    text-align: left;
    margin-top:30px;
    padding: 0;
    padding: 0 10px;
    z-index: 99;
    border-bottom-left-radius: 5px;
    border-bottom-right-radius: 5px;
}

.menu > li:hover .columndrop {
    opacity: 1;
    visibility: visible;
    margin-top: 0px;
    color: #fff;
}

.menu .columndrop .col {width: 130px;margin:0 9px;}


/*.coldrop full width dropdown */
.menu .col {
    width: 14.1%;
    float: left;
    color:white;
    margin: 0 0 0 2.2%;
}

.menu .col ul {
    padding: 0;
    margin: 0;
}

.menu .col ul li {
    padding: 0;
    list-style: none;
    font-size: 11px;
}

.menu .col h3 {
    font-size: 16px;
    padding: 14px 0;
    font-weight: 400;
    margin: 5px 0 5px 0;
}

.menu .col ul li a {
    display: block;
    padding: 0 0 15px 0;
}
.menu .col ul li a:hover {
    color: #111;
    text-decoration: underline;
}

/*Animation Effect for Dropdown  */
.menu > li > ul li ul, .menu li >ul li, .menu > li > .megadrop, .menu > li > .columndrop, .menu > li > ul, .menu > li {
    transition: all 0.2s ease-in-out;
    -moz-transition: all 0.2s ease-in-out; /* Firefox 4 */
    -webkit-transition: all 0.2s ease-in-out; /* Safari and Chrome */
      -ms-transition: all 0.2s ease-in-out; /* IE 11 */
    -o-transition: all 0.2s ease-in-outs; /* Opera */
}


Step 5. Our lovely horizontal dropdown menu unfortunately looks quite tiny on mobile screens, so let’s make sure mobile browsers will be fully zoomed-in when they load our page by adding the viewport meta tag.


<meta name="viewport" content="width=device-width, initial-scale=1">


Of course, now our dropdown menu looks even worse on mobile devices, and most of it doesn’t even fit on the screen! Let’s add in some media queries to style our list into a vertical list below our breakpoint. Our breakpoint is determined by the point at which our menu breaks onto two lines.


Step 6. At our breakpoint, we’ll remove the floats and set the list items and unordered lists to width: 100%. Right now, when we hover over our parent items, their child lists are displayed over top of the items beneath it.


/* Responsive container Setting */
@media only screen and (min-width: 768px) and (max-width: 959px) {
    .menu-container {
        width:768px;
    }
}

@media only screen and (min-width: 480px) and (max-width: 767px) {
    .menu-container {
        width: 420px;
    }
}

@media only screen and (max-width: 479px) {
    .menu-container {
        width: 300px;
    }
}

label.responsive_menu span {
    margin-left: 10px;
    color: white;
    display: none;
}

@media only screen and (max-width: 959px) {

/* New direction for third dropdown level */
.menu > li > ul li ul li ul {
    left: -200px;
    z-index: 3;
}

.menu > li > a{
    padding: 20px 12px;
    font-size: 12px;
}

.menu .columndrop .col {width: 120px;margin:0 5px;}

}

@media only screen and (max-width: 767px) {

    .menu {
      display: none;
    }

    label.responsive_menu span {
        display: inline;
        font-size: 20px;
        font-variant: small-caps;
        font-weight:400;
    }

    label.responsive_menu {
      position: relative;
      display: block;
      width: 100%;
      background-color: #005b68;
      padding: 15px 0;
     
    }

    .menu {
        padding: 0;
    }

    .menu li {
        width: 100%;
        display:block;
        text-align: left;
        margin-left: 0;
    }

    .menu > li {
        border-right: none;
        padding: 18px 0px;
        position: relative;
    }

    .menu > li > a {
        display: inline;
    }

    .menu li ul, .menu li .megadrop, .menu li .columndrop {
        top:45px;
    }

    .menu li ul {
        padding: 0;
    }

    .menu .megadrop, .menu .columndrop {
        width: 100%;
        padding: 0 2.5%;
    }

    .menu li > ul li {
        padding: 18px 0px;
    }

    .menu .col, .menu .columndrop .col {
        width: 94%;
        padding: 0 3%;
    }

    .menu > li > ul {
        width: 100%;
    }

    .menu > li > ul li ul {
        width: 100%;
        top:43px;
        left: 0;
        margin-top: 30px;
        z-index: 2;
    }

    .menu > li > ul > li:hover ul {
        margin-top: 0;
    }
   
        #responsive_menu:checked+.menu {
        display: block;
    }

    label:after {
        position: absolute;
        top:9px;
        right: 10px;
        content: "\2263";
        font-size: 35px;
        color: #FFF;
    }


    .menu > li > ul li ul li ul {
        width: 100%;


        top:43px;
        left: 0px;
        margin-left: 0;
        margin-top: 30px;
    }

    .menu > li > ul > li ul li:hover ul{
        margin-top: 0;
    }

    .menu > li > ul li{
        padding: 15px 0 15px 6%;
        width: 94%;
    }

    .menu > li > ul li ul li{
        padding: 15px 0 15px 9%;
        width: 91%;
    }

    .menu > li > ul li ul li ul li{
        padding: 15px 0 15px 12%;
        width: 88%;
    }
   
    .menu ul li.dropdown:after {
        left: 90%;
    }  

    /* Disable animation for dropdown */
    .menu > li > ul li ul, .menu li >ul li, .menu > li > .megadrop, .menu > li > .columndrop, .menu > li > ul, .menu > li {
        transition: none;
        -moz-transition: none;
        -webkit-transition: none;
         -ms-transition: none;
        -o-transition: none;
    }

}


Though this technique may be well-suited to certain situations and menu structures, there are still a lot of other options out there for taming navigation on mobile devices. In our next Tutorial we are going to tell you how add it to blogger. stay tuned for our next tutorial.
Read Article →

4 comments

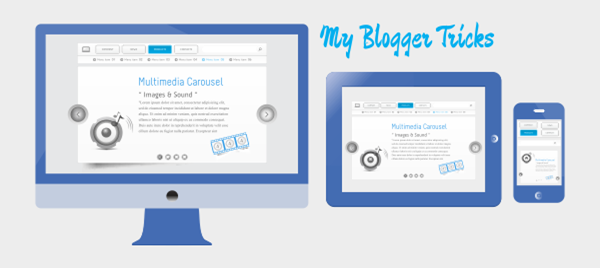
Reponsive Moniter, Tablet and Smart PhoneResponsive templates are necessary to have a website display correctly on every device. To begin creating your own Responsive Template, you will need to understand the CSS media property and what type of screens mobile phones, tablets and desktop computers are. Designing Mobile Responsive Templates has become a trending topic in web today. Mobile Technology and Mobile Traffic has evolved massively from 2011 to 2013, People now prefer reading articles on their Tablet, IPhone, Smart Phone. You can create your own Responsive Web Design (RWD) using HTML and CSS. Before we get started, we will need to get an idea of what we need to do to create the Responsive Template. We are releasing the first ever complete step by step Tutorial Guide on Responsive Blogger Templates to the Google Blogger Community.


CSS Media Type Detail

A CSS Media type is a CSS rule that allows the website to detect the type of media (For Example, browser size, screen resolution) and display specific CSS code accordingly. There are many different device types that can access the web. Below is a table of the possible device types. We will only be working with the "screen" CSS Media type. The other types are for coding your site for Access ability.


CSS Type          CSS Type Description

all                            Detects all device media type

aural                       Detects speech and sound devices for Accessibility

braille                     Detects braille tactile feedback devices for Accessibility

embossed             Detects paged braille printers for Accessibility

handheld               Detects devices that are handheld

print                        Detects if its a printer

projection              Detects projected slide presentation

screen                     Detects computer screens


Display Resolutions for Devices

Before you create your website, you will want to get an idea of what size your site should be on any given device. Below are lists of popular, mobile Phone, Tablet, and Desktop computer display sizes. You can also read briefly  article on Wikipedia.

Device resolutions can actually range from 320px - 1,920px! Unfortunately this large of a range brings complexity so let's break down the good, the bad, and the ugly.

Good:
Each device has a min and max-device width or 'trigger' point in portrait and landscape view. In other words, if you use a media query with a given conditional statement in your email, it will respond to that breakpoint.

Bad:

  1. Some devices trigger the same min and max-dimensions in portrait AND landscape view
  2. Android users can define a 'zoom' setting which changes the resolution of the display
  3. The introduction of Apple's Retina Display and the HD quality resolutions supported on several new Android devices use a pre-set 'zoom' multiplier to display your email.


Mobile phone sizes.

The following are a few popular devices size and resolution to give you an idea of what size you will want to make your website. Understanding Screen Densities.


  • iPhone 4S: 3.5 inches 640 x 960px
  • Samsung Galaxy Nexus: 4.65 inches 720 x 1280px
  • Sony Ericsson: 4 inches 480 x 854px
  • Nokia Lumia 800: 4.5 inches 480 x 800px
  • Motorola Photon 4g/ELECTRIFY: 4.3 inches 540 x 960px
 

Tablet screen sizes.

Mobile phones, tablets can vary between brands and types on the size of the display.

  • Apple iPad: 9.7 inches 1024 x 768px
  • Kindle Fire HD 8.9: 8.9 inches 801 x 533px
  • Samsung Galaxy Tab 10.1: 10.1 inches 1280 x 800px
  • Nexus 7: 7 inches 966 x 603px
  • Windows Surface Pro: 10.6 inches 1920 x 1080px


How to design Responsive Layouts?

If you have some know how about CSS and HTML it will b very easy for you to design responsive layout for your webpage and when you will yourself design it then trust me you will b having great passion for design responsive webpage.

You would love to play with your layout columns using just your browser.

Before 2 years CSS3 has introduced  new techniques of reaching some frequently used functions. It is no more limited to just styles but it now supports some really interesting front-end programming functions. The most popular amongst them are Media Queries (@media ) that acts like conditional IF statements used in blogger. You must be familiar that how difficult it is to click a web link in IPhone unless you zoom it.. In order to tell the browser to detect the screen size we will add a META viewport tag inside <head> section of your layout.


The viewport Meta tag alters the behavior of a mobile browser by modifying the "virtual viewport" of the device. The virtual viewport is the view of a mobile device screen that is other than the default view; therefore being deemed "virtual". This allows the screen on devices to have specified zoom behaviors. Below is the code snippet we will use.


<meta name="viewport" content="width=device-width">


This Meta tag tells the mobile device to not zoom. This allows the Responsive Template for mobile devices to be loaded in the scripts. Below is a table of different properties that can be used for the viewpoint Meta Tag.


Using CSS media queries to target different devices

iPhones, IPads, Android Tablets, TVs, and oh yes, the PC. Just a few years ago it was hard to imagine anything other than your bulky desktop or laptop at best travelling the information highway, but nowadays, those devices seems to be more and more in the minority. CSS media queries lets you quickly target different devices in your CSS, primarily through the window/screen dimensions of these devices.

Targeting "small screen" devices

To kick things off, you can use the below to target "small screen" devices:


/* target mobile devices with max device width 480px  */
@media screen and (max-device-width: 480px) {
/* CSS Properties for Smart Phones */
}


In our next part we will teach you how to design responsive Template for your website or blogger blog.


Any Trouble

If you are facing confusion in any part just  leave your valuable comment in the comment box below. Please let me know how useful was this tutorial for you and did it help answering most of your questions…?

Read Article →

1 comments

Iphone_navigation_menu

There are many ways to approach navigation on your website and they all have their pros and cons. We have the top horizontal navigation bar, which can limit the number of links you can have before you have to resort to sub menus which, in my opinion, aren’t the best — but if you’re only looking to keep a couple of items in your navigation bar, this could be the one for you. Another approach is the vertical sidebar menu, but a drawback of this approach is that users can become overwhelmed when sub menus start popping out from all over the place. Finally, there’s the tab bar navigation system – the problem with this approach is that it takes a lot more time to design but if you design it well, boy is it good.


Live Preview


How to add it to blogger

1. Go to Layout > Add A Gadget and select HTML/JavaScript gadget.

2. Copy the HTML link and paste it inside the content box.


/* Old */
.old {
       width: 960px;
       height: auto;
}

.old ul {
    display: inline-block;
    outline: none;
    cursor: pointer;
    text-align: center;
}

.old ul li {
    float: left;
    list-style: none;
}

.old ul li a {
    font: bold 12px/100% "Lucida Sans Unicode", Arial, Helvetica, sans-serif;
    padding: 11px 35px;
    text-decoration: none;
    color: rgba(0,0,0,.8);
    text-shadow: 0 1px 0 rgba(255,255,255,.5);
    background: -webkit-linear-gradient(top, #cacaca, #848484);
    background: -moz-linear-gradient(top, #cacaca, #848484);
    background: -ms-linear-gradient(top, #cacaca, #848484);
    background: -o-linear-gradient(top, #cacaca, #848484);
    background: linear-gradient(to bottom, #cacaca, #848484);
}

.old ul li a:before {
    border-left: 1px solid rgba(255,255,255,.1);   
    content: "";
    padding: 10px 35px;
    margin: 0 -35px;
    position: relative;
}

.old ul li a:after {
    border-right: 1px solid rgba(255,255,255,.1);
        box-shadow: 1px 0px 0px rgba(0,0,0,.5);
    content: "";
    padding: 10px 35px;
    margin: 0 -35px;
    position: relative;
}

.old ul li:last-child a:after {border: none; box-shadow: none;}

.old ul li:first-child a {-moz-border-radius: 5px 0 0 5px; border-radius: 5px 0 0 5px;}
.old ul li:last-child a {-moz-border-radius: 0 5px 5px 0; border-radius: 0 5px 5px 0;}

.old ul li a:hover {
    background: -webkit-linear-gradient(top,  #929292,  #535353);
    background: -moz-linear-gradient(top,  #929292,  #535353);
    background: -ms-linear-gradient(top,  #929292,  #535353);
    background: -o-linear-gradient(top,  #929292,  #535353);
    background: linear-gradient(to bottom,  #929292,  #535353);
}

.old ul li a:active {
    -webkit-box-shadow: inset 0 5px 10px rgba(0,0,0,.5);
    -moz-box-shadow: inset 0 5px 10px rgba(0,0,0,.5);
    box-shadow: inset 0 5px 10px rgba(0,0,0,.5);
}

    <div class="old">
        <ul>
            <li><a href="#">Home</a></li>
            <li><a href="#">Store</a></li>
            <li><a href="#">Mac</a></li>
            <li><a href="#">iPod</a></li>
            <li><a href="#">iPhone</a></li>
            <li><a href="#">iPad</a></li>
            <li><a href="#">iTunes</a></li>
            <li><a href="#">Support</a></li>
        </ul>
    </div>


You can apply this not only to navigation bars but also to buttons that ask for Download files or take users to social network pages.

To rename the category, simply replace Home with your own text. As for the link, just replace  # with the Page intended URL. Hope you enjoyed with this tutorial, don’t forget to tell thanks and leave a comment :) Enjoy..!!

Read Article →