Menu Close Menu

2 comments

Previous Home Next

In this post I am gonna show you how replace older post, newer post and home text with Images. I have 100 images for this tips which I share in my download section you download it from our download section in free of cost. These links are shown at the bottom of your post body. if you do not want to display these links I will tell you in my next post how to remove these links. you can also change these words with your own words for example “oldre posts” to “Past” “Home” to Present” and “Newer Posts” to “Furure” you may substitute the Older posts with other words like previous Article, Yesterday’s Article or anything you want. I am also making video tutorial for this tricks see video End of this Article. So Lets Start the tutorial.


1. How To Replace With your Own words.

Always Remember Before Editing Your Template Make a Template Backup (how to make a template backup)

1. Go to your blogger Dashboard>> Template >> Proceed and click on expand widgets box.

Press CTRL+F and Find The Following Code in you template. ( how to find code using search bar)

<b:includable id='nextprev'>
<div class='blog-pager' id='blog-pager'>
<b:if cond='data:newerPageUrl'>
<span id='blog-pager-newer-link'>
<a class='blog-pager-newer-link' expr:href='data:newerPageUrl' 
expr:id='data:widget.instanceId + "_blog-pager-newer-link"' 
expr:title='data:newerPageTitle'><data:newerPageTitle/></a>
</span>
</b:if>
<b:if cond='data:olderPageUrl'>
<span id='blog-pager-older-link'>
<a class='blog-pager-older-link' expr:href='data:olderPageUrl' 
expr:id='data:widget.instanceId + "_blog-pager-older-link"' 
expr:title='data:olderPageTitle'><data:olderPageTitle/></a>
</span>
</b:if>
<b:if cond='data:blog.homepageUrl != data:blog.url'>
<a class='home-link' expr:href='data:blog.homepageUrl'><data:homeMsg/></a>
<b:else/>
<b:if cond='data:newerPageUrl'>
<a class='home-link' expr:href='data:blog.homepageUrl'><data:homeMsg/></a>
</b:if>
</b:if>
</div>

and change the following four lines with your Words.

1. <data:newerPageTitle/> to Future

2. <data:newerPagetitle/> to Past  and 

3. <data:homeMsg/> to Home or

You can of course replace these with other words. For example, you may substitute the Older Posts  with other words like Previous Rants, Yesterday's words, Lost Files or anything you like.

<b:includable id='nextprev'>
<div class='blog-pager' id='blog-pager'>
<b:if cond='data:newerPageUrl'>
<span id='blog-pager-newer-link'>
<a class='blog-pager-newer-link' expr:href='data:newerPageUrl'
expr:id='data:widget.instanceId + "_blog-pager-newer-link"'
expr:title='data:newerPageTitle'>Future</a>
</span>
</b:if>
<b:if cond='data:olderPageUrl'>
<span id='blog-pager-older-link'>
<a class='blog-pager-older-link' expr:href='data:olderPageUrl'
expr:id='data:widget.instanceId + "_blog-pager-older-link"'
expr:title='data:olderPageTitle'>Past</a>
</span>
</b:if>
<b:if cond='data:blog.homepageUrl != data:blog.url'>
<a class='home-link' expr:href='data:blog.homepageUrl'>Home</a>
<b:else/>
<b:if cond='data:newerPageUrl'>
<a class='home-link' expr:href='data:blog.homepageUrl'>Home</a>
</b:if>
</b:if>
</div>

Final Text Look Like This..

Testing Screen SHoot

That’s it you are done click on preview button and check all things working fine then click on save.

2. How Replace Older Newer Home Links With Images

Previous Home Next

1. Go to your blogger Dashboard>> Template>> Proceed>> and Click on Expand Widget Box.

Press CTRL+F and find the following code.

<data:newerPageTitle/>

2. and replace above code with the following code.

<img border="0" height="50"
src=http://4.bp.blogspot.com/-5KhhMJZ7N5A/T2TpPgm7kuI/AAAAAAAAA0Y/9X4ITsILU_U/s200/Previous+Icon.png 
width="50" />

3. Find The Following Code.

<data:olderPageTitle/>

4. and replace  with these lines.

<img border="0" height="50" 
src="http://4.bp.blogspot.com/-eHAvMF8QzMo/T2TpOpHsrBI/AAAAAAAAA0Q/RWR2MurGnJQ/s200/Next+Icon.png" 
width="50" />

5. And finally find the following Code. in template you have found two lines like this code.

<data:homeMsg/>

6. Replace above code with this.  you have found 1 of 2. Replace 1 of 2 codes with this code.

<img border="0" height="50" 
src="http://2.bp.blogspot.com/-PJ9bQIARuyc/T2TpNnibfJI/AAAAAAAAA0M/cRHTnOFbbAk/s200/Home+Icon.png" 
width="50" />

That’s it click on preview and finally click on save. your done. you can also use your own images in my next post I am share with lots of images for this tricks so stay connected with social network or subscribe me on our blog. and your can also use these images.

<img border="0" height="30" 
src="http://4.bp.blogspot.com/-mRF8lPfU1e4/T2WkxZH5YxI/AAAAAAAAA2g/fW1F0ppqoUQ/s320/Previous+Arrow.png" 
width="150" />
<img border="0" height="30" 
src="http://3.bp.blogspot.com/--uKj9JEjmy8/T2WkuSzKdbI/AAAAAAAAA2Q/4VoxSrp_zxw/s320/Home.png" 
width="150" />
<img border="0" height="30" 
src="http://2.bp.blogspot.com/-Y966w-pt7Rs/T2WkvevjEYI/AAAAAAAAA2Y/VcTd9dHImpo/s320/Next+Arrow.png" 
width="150" />

Next Previous Buttons

Need Help!……

This Tricks would work just fine if all the above steps are carefully followed. The steps are extremely easy to try. I just hope you find it worth using. If you ran into any technical problem just feel confident to leave your comments. I would love to help you out. Wishing you all the best of life buddies. Thanks for Reading Our Post.
Read Article →

5 comments

Drop Down Menu

In this post I am going to share with a beautiful grey dropdown menu created with CSS & JavaScript. I am also using this menu on our blog.  Drop down menus provide easy and neat navigation by organizing and featuring important category links of your blog. With increased use of categories and tags, organizing links in a simple menu is difficult therefore the menu that we share today provides you with easy control over its column and rows display. The top bar menu instruction below are for blogger users only. So Read All Step Carefully Dropdown menu work Perfect. See Live Demo on our demo blog and check it our Drop Down Animated Effect.


1. Add Drop Down Menu Style Sheet.

2. Add JavaScript in Head Section.

3. Final Add HTML Code For Links.

That’s it  in three steps you are done.

Always Remember Before Editing Your Template Make a Template Backup (how to make a template backup)

1. Go to your blogger Dashboard>> Template>> Proceed Press CTRL+F and the following code in your template. (how to find code using search bar)

]]></b:skin>

2. and paste the following code before/above  “]]></b :skin>”

/*Start Drop Down CSS by http://bl0gger-tricks.blogspot.com*/
.nav{
width:100%;
height:36px;
background:#f9f9f9;
border-top:1px solid #e4e4e4;
border-bottom:1px solid #e4e4e4;
box-shadow: 0 2px 2px #eee;
z-index:1;
}

.menu{
width:1050px;
list-style:none;
font:16px Source Sans Pro,Arial,Verdana;
font-weight: normal;
text-align:center;
margin:0 auto;
}

.menu a{
float:left;
color:#000000;
text-decoration:none;
width:100px;
line-height:36px;
-moz-transition:.2s linear;
-webkit-transition:.2s linear;
transition:.2s linear;
-o-transition:.2s linear;
}

.menu a:hover,li.menuhover a{
color:#111;
background:#efefef;
-moz-transition:.2s linear;
-webkit-transition:.2s linear;
transition:.2s linear;
-o-transition:.2s linear;
}

.menu li,.menu li span{
position:relative;
float:left;
width:100px;
z-index:2;
border-left:1px solid #e3e3e3;
}

.menu li span{
border-right:1px solid #e3e3e3;
border-left:none;
}

.menu ul{
display:none;
position:absolute;
font:normal 16px Source Sans Pro,Arial,Verdana;
font-weight: normal;
top:36px;
left:0;
background:#fbfbfb;
display:none;
list-style:none;
box-shadow:0 2px 3px #ccc;
}

.menu ul li{
float:none;
border-top:1px solid #ccc;
width:150px;
}

.menu ul li a{
float:none;
display:block;
background:none;
line-height:36px;
width:137px;
text-align:left;
padding-left:10px;
color:#444;
}

.menu ul li a:hover{
background:#fbfbfb;
color:#000000;
border-left:5px solid #088A4B;
-webkit-transition:ease-in 0.15s all;
-moz-transition:ease-in 0.15s all;
-o-transition:ease-in 0.15s all;
-ms-transition:ease-in 0.15s all;
transition:ease-in 0.15s all;
text-shadow:0 1px 0 #fefefe
}
/*End Drop Down CSS*/

Note:-  in CSS Section you can edit Font-size , Font Style, Font Color, Background, and Also Edit Hover Effect.  if you want to edit leave your comment below.

3. Find The Following Code in your template.

</head>

4. Paste the Following Script before/above “</head>”

<script type='text/javascript'>
//<![CDATA[
var dropd={};function T$(i){return document.getElementById(i)}function T$$(e,p){return 

p.getElementsByTagName(e)}dropd.dropdown=function(){var p=

{fade:1,slide:1,active:0,timeout:200},init=function(n,o){for(s in o){p[s]=o[s]}

p.n=n;this.build()};init.prototype.build=function(){this.h=[];this.c=[];this.z=1000;var s=T$

$('ul',T$(p.id)),l=s.length,i=0;p.speed=p.speed?p.speed*.1:.5;for(i;i<l;i++){var h=s

[i].parentNode;this.h[i]=h;this.c[i]=s[i];h.onmouseover=new Function(p.n+'.show('+i

+',1)');h.onmouseout=new Function(p.n+'.show('+i+')')}};init.prototype.show=function(x,d){var 

c=this.c[x],h=this.h[x];clearInterval(c.t);clearInterval(c.i);c.style.overflow='hidden';if(d)

{if(p.active&&h.className.indexOf(p.active)==-1){h.className+=' '+p.active}if(p.fade||p.slide)

{c.style.display='block';if(!c.m){if(p.slide)

{c.style.visibility='hidden';c.m=c.offsetHeight;c.style.height='0';c.style.visibility=''}else

{c.m=100;c.style.opacity=0;c.style.filter='alpha(opacity=0)'}c.v=0}if(p.slide){if(c.m==c.v)

{c.style.overflow='visible'}else{c.style.zIndex=this.z;this.z++;c.i=setInterval(function()

{slide(c,c.m,1)},20)}}else{c.style.zIndex=this.z;this.z++;c.i=setInterval(function(){slide

(c,c.m,1)},20)}}else{c.style.zIndex=this.z;c.style.display='block'}}else{c.t=setTimeout

(function(){hide(c,p.fade||p.slide?1:0,h,p.active)},p.timeout)}};function hide(c,t,h,s){if(s)

{h.className=h.className.replace(s,'')}if(t){c.i=setInterval(function(){slide(c,0,-1)},20)}

else{c.style.display='none'}}function slide(c,t,d){if(c.v==t){clearInterval(c.i);c.i=0;if

(d==1){if(p.fade){c.style.filter='';c.style.opacity=1}c.style.overflow='visible'}}else{c.v=(t-

Math.floor(Math.abs(t-c.v)*p.speed)*d);if(p.slide){c.style.height=c.v+'px'}if(p.fade){var 

o=c.v/c.m;c.style.opacity=o;c.style.filter='alpha(opacity='+(o*100)+')'}}}return{init:init}}();
//]]>
</script>

and click on preview and all things working fine then click on save and your template editing for dropdown is done. now time to add links below header.

5.  and finally add HTML Code Where you Want To show your Navigation Menu if you are already using drop down menu replace the HTML code with below html code.

<!-- Start - Navigation Menu  -->
<div class='nav'>
<ul class='menu' id='menu'>
<li><a expr:href='data:blog.homepageUrl'>Home</a></li>
<li><a href='#>Blogger</a></li>
<li><a href='#>Adsense</a></li>
<li><a href='#>SEO Tips</a></li>
<li><a href='#'>Templates</a></li>
<li><a href='#'>Widgtes</a></li>
<li><a href='#>Downloads</a></li>
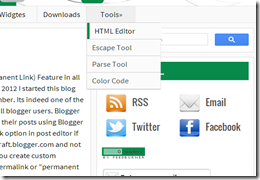
<li><a href='#'>Tools&#187;</a>
<ul>
<li><a href='#>HTML Editor</a></li>
<li><a href='#>Escape Tool</a></li>
<li><a href='#>ParseTool</a></li>
<li><a href='#>Color Code</a></li>
</ul>
</li>
</ul>
</div>
<!-- End - Navigation Menu -->
<script type='text/javascript'>
var dropdown=new dropd.dropdown.init(&quot;dropdown&quot;, {id:&#39;menu&#39;,
active:&#39;menuhover&#39;});
</script>

That’s it you are done.  The widget is extremely easy to be edited. To change links title simply replaced the text with your page titles and replace the hash sign “#”   with  respective links.

click view blog and check it out your new dropdown menu..


Need Help!…

For any further help please feel free to post your comments in the comment box below.  Don’t Forget to subscribe our Rss Email Service or follow me on social networks.

Read Article →

3 comments
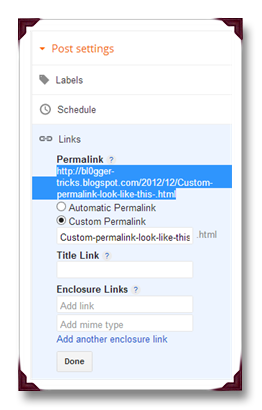
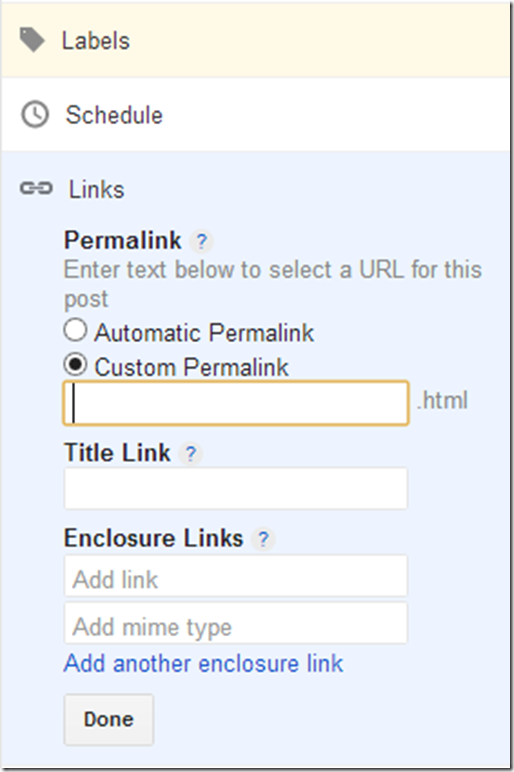
Blogger add permalink link (or Permanent Link) Feature in all blogs. Blogger introduce this in June 2012 I started this blog after June so I share this tip in December. Its indeed one of the most awaited SEO development for all blogger users. Blogger users can now write custom URLs for their posts using Blogger in draft. You will now find a permalink option in post editor if you log into Blogger account using draft.blogger.com and not blogger.com. This option would let you create custom permalinks for your blogger posts. Permalink or "permanent link"  in layman terms is the URL that appears in your browser address bar. For example if your post title is “Blogger Basic TIps”, the blog post’s permalink would be something like  http://yourblog.blogspot.com/ 2012/06/blogger-basic-tps.html   Till date Blogger never allowed the user to control what the permalink should be but it rather assigned a permalink on it’s own. You can’t Make permalink for your old published post but you can in your new posts. If you want to check out this option go to your blogger dashboard and make new post you see links tab on the right side of your blogger post editor and click on links tab your can see this type window.

How To Create Permalink

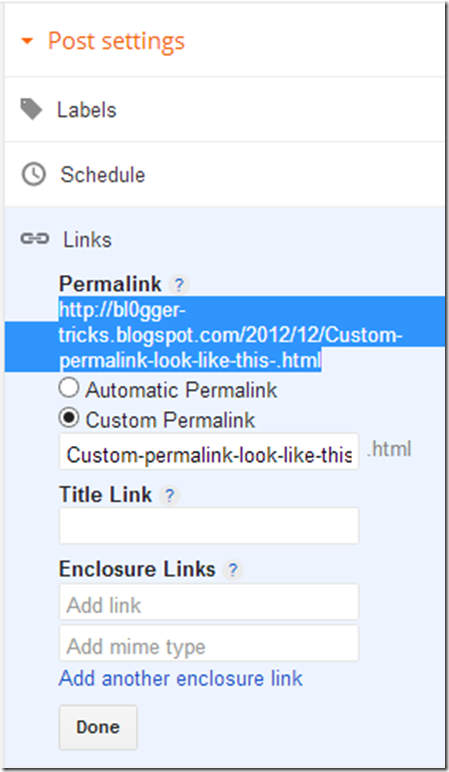
When you click on link text this type window appear and click on custom permalink write your permalink link screen shoot below.

Custom Permanant link

Blogger Permalink Feature only accept three character colon “:”, forward slash “/” and a dash
“-“. These three, only a dash is under your control because the remaining two are used in http protocol “colon” by browsers and for directory creation “forward slash”. In you want make SEO Friendly Custom Permalink so use only dash like this link.
 http://bl0ggertricks.blogspot.com/2012/12/12/custom-permalink-link-look-like-this.html

More Detail From Google

For Further Help See Google Video Tutorial

More Question

I hope understand about blogger permalink feature if not leave your comments & question below in comment box and subscribe me on this blog for daily updates. Thanks for reading our post.
Read Article →

6 comments
Share your blog in popular social networking/bookmarking sites is very important to get good traffic and I think this is the easiest way for increase our blog/website traffic. This is indeed the most beautiful Social Network floating share widget featuring the top Social Network sites (Google Plus, Twitter and Facebook ). In this tutorial we'll create Floating Sharing button for your blog. With the 'Sharethis' button visitors will be able to share your content with their friends or community, and you know yourself what will happen. Share This is a very popular service offering multiple Social Bookmarking Widgets for blogs and websites.i have a Blogger Tips show you how to add the new ShareThis Floating Buttons to various position on your blog. You can see the buttons in question to the end of this Article and that position will be one of the options for your blog. In this part I going to show you  Floating Sharing buttons with Vertically Align at the right side of your blog.

ShareThis Tool Tutorials
Part 2: How To Add Share This Floating Right Buttons to your Blog


Note:- Always Make a Backup of Your Template Before You Edit Your Template –( how to make a template backup)
1. Go To Your Blogger Dashboard>> Template>> Proceed.
2. Press CTRL+F and find the following Code in you template. (how to find code using search bar)
</head>
3. paste the below code before/above </head>.
<script type="text/javascript">var switchTo5x=true;</script>
<script type="text/javascript" src="http://w.sharethis.com/button/buttons.js"></script>
<script type="text/javascript" src="http://s.sharethis.com/loader.js"></script>
4. Find The Following Code in your Template.
</body>
5. paste the below code befor/above </body>
<script type="text/javascript">stLight.options({publisher: "1cce35ce-6744-4bac-9fa5-8f17a67a6fa6"});</script>
<script>
var options={ "publisher": "1cce35ce-6744-4bac-9fa5-8f17a67a6fa6", "position": "left", "ad": { "visible": false, "openDelay": 5, "closeDelay": 0}, "chicklets": { "items": ["googleplus", "facebook", "twitter", "stumbleupon", "linkedin", "pinterest", "email", "sharethis"]}};
var st_hover_widget = new sharethis.widgets.hoverbuttons(options);
</script>
5. and click on preview button and check all things is ok. if ok press save button..! That’s is your done. Hope you like the tutorial and the floating share widget. We'd be glad to hear from you. if you have any trouble in this tutorial leave your comments below in comment box. thanks for reading our tutorials. also check out my previous post how to add sharethis buttons below post with counter.

Read Article →

3 comments
In this post I am gonna show you how to manually add author box below post. The technique of having Multiple authors to manage a Blog is getting popular these days. Though this feature was already available in wordpress , recently Blogger too has enabled this feature. So now Blogger Users can have upto 100 multiple Authors or co-Authors for their blogs. in order to better serve them it is important to display some information about them in a polite manners. Here is I will show you two methods. in first method you can just add below post title Posted by. text by inviting guest author and in method two you can add manual Attractive banner below post with box and image hover effect.

See Live Demo Below..


To create this type of Beautiful box for your guest authors you would need to play with some CSS and HTML Codes.
Are Second Option for Author Back link you can mostly on blogger blog. like this below post title.

How to Invite Authors on your blogger blog


Posted By

How to add author box manually below post


In this step we need to edit your template so Remember always Make a Backup of Your Template Before You Edit Your Template (how to make a template backup.)
1. Go to your blogger Dashboard>> Template>> Proceed and click on expand widget box.
2. Find The following code in your template. (how to find code using search bar)
]]></b:skin>

3. paste the below code before/above ]]></b:skin>.
/* Start Author Link by http://bl0gger-tricks.blogspot.com */
#author-link {
font-family: Trebuchet MS, Arial, Verdana;
width:auto;
height: 100px;
-webkit-border-radius: 10px 10px 10px 10px;
-moz-border-radius: 10px 10px 10px 10px;
border-radius: 10px 10px 10px 10px;
-goog background: none repeat scroll 0 0 transparent;
border: 1px solid #D3D3D3;
padding: 8px;
-webkit-transition: all 0.3s ease-out;
-moz-transition: all 0.3s ease-out;
-o-transition: all 0.3s ease-out;
-ms-transition: all 0.3s ease-out;
transition: all 0.3s ease-out;
}

#author-link:hover {
background: #FFF;
-webkit-box-shadow: 1px 1px 2px #CCC inset;
-moz-box-shadow: 1px 1px 2px #CCC inset;
box-shadow: 1px 1px 2px #CCC inset;
}
#author-link a {
font-family: Maven Pro,Arial,Verdana;
color: #016AFF;
}
#author-link a:hover {
font-family: Maven Pro,Arial,Verdana;
color: #333333;
}
#author-link img {
border:1px solid #9ED0DE;
-moz-transition: all 0.5s ease-out;  
-o-transition: all 0.5s ease-out;  
-webkit-transition: all 0.5s ease-out;  
-ms-transition: all 0.5s ease-out;  
transition: all 0.5s ease-out;
zoom: 1;  
-webkit-border-radius: 10px;
-moz-border-radius: 10px;
-webkit-transform:  rotate(+5deg);
-moz-transform: rotate(+5deg);
border-radius: 10px;
display:inline;
float:left;
margin:0 15px 0 0;
max-height:120px;
}

#author-link img:hover  {
zoom: 1;
-webkit-transform:  rotate(0deg);
-moz-transform: rotate(0deg);
-moz-box-shadow: 1px 1px 4px #000;
-webkit-box-shadow: 1px 1px 4px #000;
box-shadow: 1px 1px 4px #000;
} 
/* End Author Link by http://bl0gger-tricks.blogspot.com */

Note:- In author link CSS codes you can edit Box Width, Box Height, Font Color, Font Name, Font Size, and also Border radius. For Color editing check Color Code Generator Tools on our blog.
That’s it your done. click on save button.

4. Go to your blogger post editor by going Blogger Dashboard>> Click on pencil icon.
and paste the following code where u want to show blog author box.

<div id="author-link"><img  alt="Author" border="0" src="https://lh3.googleusercontent.com/-wr1HKQ4h3Io/AAAAAAAAAAI/AAAAAAAAAUg/72rRzBU6Z_A/s250-c-k/photo.jpg" 
style="float: left; margin-right: 5px; width: 100px; height: 100px; " />
<b>Author - </b>Ishtiaq Ahmad is the owner of Blogger Trcisk. 
Ishtiaq  lives in Pakistan, has been blogging since 2009 and writing on Blogger Tricks since 2012.
You can find him on <a href="http://bl0gger-tricks.blogspot.com"> Blogger Tricks <a/></div>

More Answers.
Change Image link with your author image, change blogger tricks link with your author website or blog link and also change the description text with Your Text. see video below for more info about how add author link below post and check result in our HTML EDITOR. if still have any trouble please leave comment a comment below in comment section. thanks for reading our post.
Read Article →

3 comments
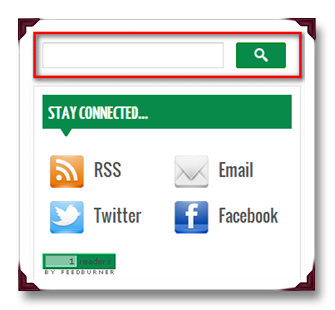
Google is the best search Engine in the world. Google update there home page in June 2011, New Google homepage with smaller logo and links moved to the top and bottom edges of the browser for a cleaner look, I think this look much better than older look. I'm sure you will have noticed the new Google design as covered in the post Evolving the Google design and experience on the official Google blog. when  see Google Style search box tutorial on http://www.Queness.com I am very happy and add this search bar on my blog. The new search bar has a more modern minimalist look with rounded corners and hover effect. you can create Google Style Search widgets with some HTML, CSS & JQuery Combination. in this tutorial I’ll also show you how to re-create Google style new search button with some simple CSS Codes. I edit this search button with Green color which compatible with my template style sheet. you can also edit button style with your template colors. so Read all steps and make a beautiful Search button. Special thanks for this tutorial goes to Awesome Queness.Com design blog again & again. You Can See Live Demo on this Blog.

Add Google Style Search Bar To Blogger

First we need to edit your blogger template so Always Make a Backup of Your Template Before You Edit Your Template (how to make a template backup.)

1. Go to your blogger Dashboard>> Template >> Proceed press CTRL+Fand  find the following Code. (how to find code using search bar)
]]></b:skin>
2. Paste following code before/above }}></b:skin.
/*Start Css For Google Style Search Box*/
/* div container containing the form */
#searchContainer {
margin:0px;
}

/* Style the search input field. */
#field {
float:left;
width:180px;
height:27px;
line-height:27px;
text-indent:10px;
font-family: Source Sans Pro, sans-serif;
font-size:1em;
color:#333;
background: #fff;
border:solid 1px #d9d9d9;
border-top:solid 1px #c0c0c0;
border-right:none;
}

/* Style the "X" text button next to the search input field */
#delete {
float:left;
width:16px;
height:29px;
line-height:27px;
margin-right:15px;
padding:0 10px 0 10px;
font-family: "Lucida Sans", "Lucida Sans Unicode",sans-serif;
font-size:22px;
background: #fff;
border:solid 1px #d9d9d9;
border-top:solid 1px #c0c0c0;
border-left:none;
}
/* Set default state of "X" and hide it */
#delete #x {
color:#A1B9ED;
cursor:pointer;
display:none;
}
/* Set the hover state of "X" */
#delete #x:hover {
color:#36c;
}
/* Syle the search button. Settings of line-height, font-size, text-indent used to hide submit value in IE */
#submit {
cursor:pointer;
width:60px;
height: 31px;
line-height:0;
font-size:0;
text-indent:-999px;
color: transparent;
background: url(http://1.bp.blogspot.com/-bGxyIDfZuHg/UNSrQ4bRerI/AAAAAAAAApk/QYrrGVAYR9o/s1600/iconsearch.png) no-repeat #088a4b center;
border: 1px solid green;
-moz-border-radius: 2px;
-webkit-border-radius: 2px;
}
/* Style the search button hover state */
#submit:hover {
background: url(http://1.bp.blogspot.com/-bGxyIDfZuHg/UNSrQ4bRerI/AAAAAAAAApk/QYrrGVAYR9o/s1600/iconsearch.png) no-repeat center #088a4b;
border: 1px solid green;
}
/* Clear floats */
.fclear {clear:both}
Note:- In Search Bar Style Sheet you can edit Font Style, Form Width, Form Border, Font Color, Font Size, Search Button Color, Search Buttons Hover Effect and search Button Border, all these editing I highlighted in blue color you can change it which look is better for your blog design if your don’t want edit just leave it same. & paste before ]]></b:skin>.
3. find the following Code. (how to find code using search bar
</head>
4. and paste the following code before </head>.
<script src='http://code.jquery.com/jquery-1.6.1.min.js' type='text/javascript'/>
<script type='text/javascript'>
$().ready(function() {
// if text input field value is not empty show the &quot;X&quot; button
$(&quot;#field&quot;).keyup(function() {
$(&quot;#x&quot;).fadeIn();
if ($.trim($(&quot;#field&quot;).val()) == &quot;&quot;) {
$(&quot;#x&quot;).fadeOut();
}
});
// on click of &quot;X&quot;, delete input field value and hide &quot;X&quot;
$(&quot;#x&quot;).click(function() {
$(&quot;#field&quot;).val(&quot;&quot;);
$(this).hide();
});
});
</script>
5. click on preview and check your blog look if all thing is ok click on save and now time to add gadget on blogger sidebar.
6. Go to your blogger Dashboard>> Layout>> and click on add a gadget a new window is popup. in new window scroll down find HTML/JAVASCRIPT when you find this click on plus button and paste this code in your HTML/JAVASCRIPT Text Area

<div id="searchContainer">
<form name="SUYB" action="/search" method="get">
<input type="text" id="field" id="s" name="q"/>
<div id="delete"><span id="x">x</span></div>
<input type="submit" name="submit" id="submit" value="Search" />
</form>
</div>

& Click Save. your Done! and see your blog new search bar look. Thanks Again to Queness.
The next few months, look for a series of design improvements across all our Tutorials, Widgets, DropDown Menu, Sharing Buttons including Templates & Social Icons Sets. So Subscribe our blog and stay Connected..
if you have any trouble about this tutorial leave your comments and questions below in comment box. Thanks for our post.
Read Article →

3 comments
Today in this tutorial I'm going to show you how to add flashing background in your blog links. in some links are very important than others on your blog page. with this script, they will be noticed more as well. Use it to give any link(s) on your page a flashing trait, with independently controlled options for each link. The script allows you to flash a link in two ways- flashing the link text itself, or its background but thanks to Dynamic Drive we can now easily change the colour of our links to several colours. I have modified the code a bit for simplicity. You can add this flashing effect to your links just in two simple steps.
Let's start the tutorial.

Link with flashing Text. Check out colour code Generator

And this link with flashing background. Check out color code Generator

First we need to edit your blogger template so Always Make a Backup of Your Template Before You Edit Your Template (how to make a template backup.)

1. Go to your blogger Dashboard>> Template>> Proceed>> press CTRL+F and find this code (how to find code by using search bar.)
</head>
2. paste this script before/above </head>.

<script type="text/javascript" src="http://www.dynamicdrive.com/dynamicindex5/flashinglinks.js"></script>

Click on the preview button to take look at the demo, if ok click on save and go to your blogger post editor and write your content. when you add an important link in your post make little change in your hyperlink as shown below.

if you want to flash only text, not a background try the following code:

<a href="here is your link" rel="flashfg[Here is your flashing color name]">Example 1</a>

and if you want your link flashing with background then make your link look like this.

<a href="here is your link" rel="flashbg[Here is your flashing color name]">Example 1</a>

Note:- if you have no idea how to generate colour code check out our colour code generator tools.

That’s it. If you feel trouble let me us know in the comment below we will try to answer your question as soon as time allows. Peace & Blessings :).
Read Article →

4 comments
Share This Social Sharing 
In this Series I am gonna show you how to add Share This floating sharing, sharethis buttons with counter, Share This Ornaments style sharing and Share This Navbar with Sharing Buttons. read full series and make your blog like Professionals. You might have noticed the 'Share This' button that appears below each of my posts. In today's tutorial we'll create this button for your blog. Why bother to use it? Well, with the 'Share this' button visitors will be able to share your content with their friends or community, and you know yourself what will happen. Share This is a very popular service offering multiple Social Bookmarking Widgets for blogs and websites.i have a Blogger Tips show you how to add the new Share This Counter Buttons to various positions on your blog. You can see the buttons in question to the end of this Article and that position will be one of the options for your blog. In this part I gonna show you  Sharing buttons with horizontal counters to publicly display the sharing activity for that piece of content.
ShareThis Tool Tutorials
Part 1: How To Add Share This Buttons With Horizontal Counters
1. Go to ShareThis Website
2. Create a free account with working email address. you can also login with you facebook acount.
3. after creating account login with your email address. and click on get sharing tools.(screen shoot show below.)

Sharethisbar
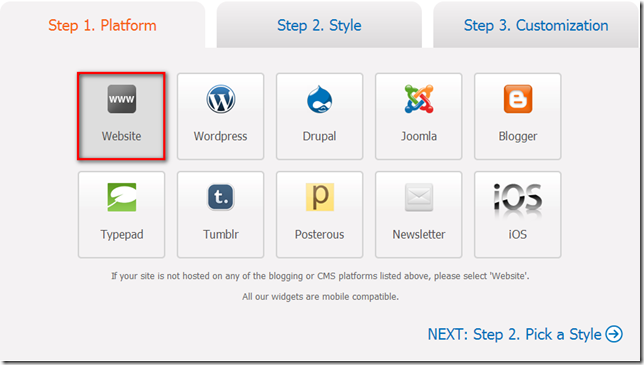
4. in platforms options select ( A Website ).
SelectAwebsite

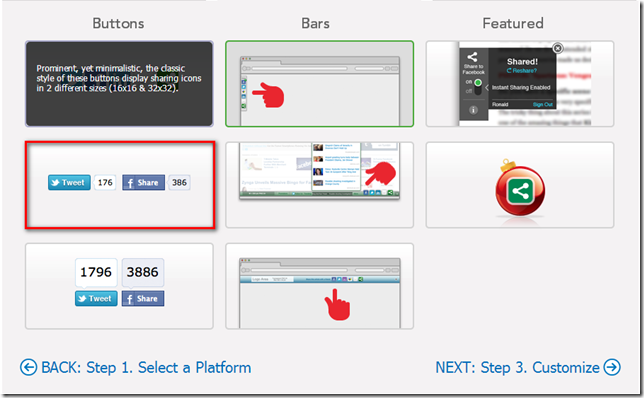
5. after Select a website click on Step 2. and select horizontal Buttons and click next.

selecthorizotalbuttons

6. add your networks by drag and drop in selected services tab. (showing screen shoot below)

Drag and drop icons

7. when you add all your network click on get code buttons and you can see this type window.
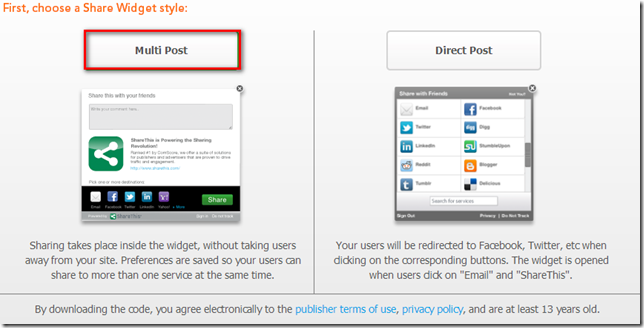
in step I suggest you select Multi Post option.

Multipost

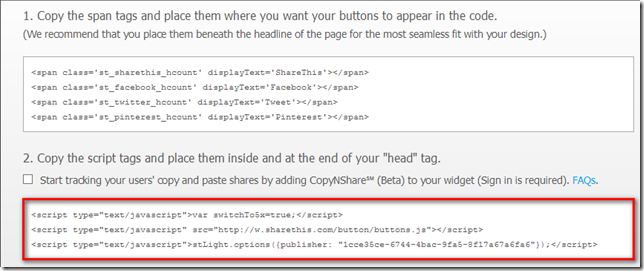
8. when you choose a style for your sharing button scroll down the window you can see generated SCRIPT & HTML code. In first step copy Sharethis Script which I highlighted in screen shoot  and paste before ending your </head>  section.

CopyScript&htmlcode

Note:- Always Make a Backup of Your Template Before You Edit Your Template –( how to make a template backup)

9. Go to your blogger Dashboar>> Template>> Proceed and on expand widget box.
Press CTRL+F and  Find  This Code “</head>”. (how to find code using search bar.)
and Paste Sharthis Buttons Script Before/Above “</head>”.

10. and now time to add buttons code to your template. you can add buttons below post title and Below Post.
For Below Post Title Find These lines (how to find code using search bar.)
<div class='post-header-line-1'/>
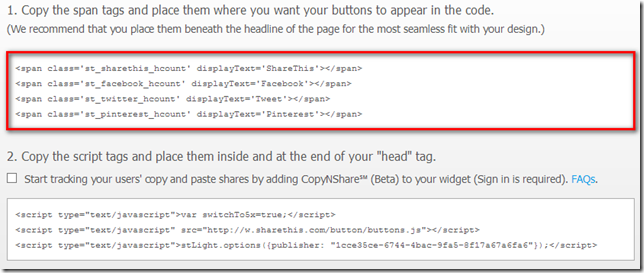
and copy HTML Code Which I Highlighted in Screen Shoot Below.

Buttons html Code
and paste after/below “<div class='post-header-line-1'/>”
if you want to show buttons below post.then find this code.
<data:post.body/>
and paste copied buttons code after/below “<data:post.body/>”
click save!!!! and your done your job!!!!. in my next post I am showing you how to add floating right sharethis sharing tool. So do your like our posts subscribe me on facebook, Twitter, Google Plus or subscribe our RSS Email Updates.

if your have any trouble about this tutorial leave your comments bleow in comments box.  thanks for reading our post.
Read Article →

4 comments
Bloggerstaticpage
In This post I am going to explain you how to hide sidebar, footer and header on static page. I am working for this tip last 8 days and  I finally took the time to generalize this tips. Anyone can use the solution in this page, and you'll get what you want  I'm not going to repeat what this tutorial does. Or maybe I will. You get to hide your sidebars and use that space to widen your main posting area, on pages that you choose. You can apply this tweak both on your static pages and your post pages. I have already posted one article on this blog how to show widget only on home or post pages and static pages. when static pages first came out. Than again, Bloggers flexibility and permission to design your page as you like it is one of the main features for which so many people prefer this platform. with ths tip you can create a different Design for each of your static pages with adding few CSS Code Lines. The Adding Code in ths tutorial is to much easier and clear and result is very Beautiful like professional Blogger look. You can see Working Demo on this blog.


Adding this Beautiful Tweak to your blogger Static Pages is just in two steps. and you’re done.

First you need to check what is Tag used in your Template.

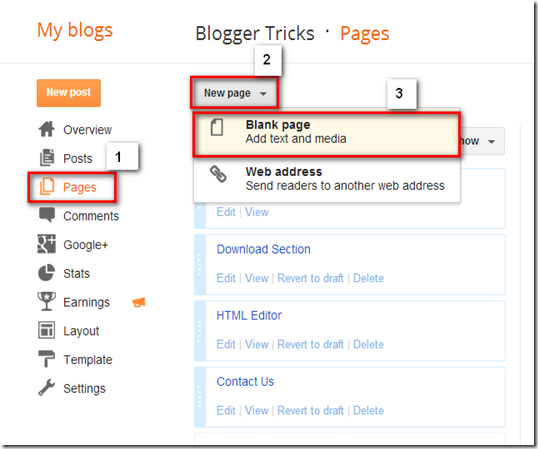
1. Go to your blogger Dashboard>> Pages >> and Create a New page. ( Create Blank Page Not a Send Readers to another web address)
and paste this code at the top of your static page, before the content and click preview. if all thing is ok write your content and click on publish.
<style type="text/css">
/*<![CDATA[*/
#footerwrapper,#sidebarwrapper{
height: 0; 
visibility; hidden !important; 
display:none !important;
}
.home-link {
display:none !important;
}
#credits {
display:none !important;
}
#contentwrapper{
float: Center; 
width: 100%; 
margin-left: 0; 
margin-right: 0; 
margin-top:20px; 
margin-bottom: -30px; 
padding-left: 0; 
padding-right: 0; 
background: #fbfbfb; 
color: #000000;
}
.post {
width: 95%; 
margin: 0 auto; 
padding: 0;
} 
.post h1 a {
 text-align: center; padding:5px;
}
/*]]>*/
</style>

What goes into the tags are CSS rules. It depends on what we are trying to change and differs between templates. In the code above, we Remove  blog footer, post footer, feed links and sidebar. This is done in code line 2 to 8. Widen the post area to fill up the spaces vacated by the sidebars. This is done in code line 5. If you want to do this too, find out what’s your header’s or header-wrapper’s width and apply it here.

Identifying and adding your own elements to the code

Your elements’ Ids and classes maybe different from the ones given in the code above. You can find yours by going through your template code. To get an idea what to look for, here’s a sample code snippet, taken from Blogger Tricks’s Template.

#sidebarwrapper,#footerwrapper,#sidebarwrapper, #credits, .home-link {

          height: 0;>

          visibility;

          hidden !important;

          display:none !important;

        }


As you can see an element, be it a division, a section or a widget is assigned an ID and/or a class. To remove it from the Page. For an ID you need to add “#” prefix and for a class, add “.” as prefix.


Need Help……!

I am showing in video below Which tags you need for hiding sidebar, header, menu, footer and footer credits. in this code I just add codes which is mostly used in blogger template if your template is with different ids search in your template. For example if you want to hide menu from static page your menu id look like this (#menu) I am not sure but mostly designer use this id for menu. if you cant find Please leave a comments or send me your template on my email address I will try to fix the code. which is compatible with your template. My Email Address is: Tricks.blogger@gmail.com. if this code is compatible with your template. your can change content area width, background Color. font style, font color, font size, if you know about playing with CSS Codes. I highlighted a few of them in blue,

Leave your Comments & Questions Below in Comment Box. Thanks for reading our post.
Read Article →

12 comments
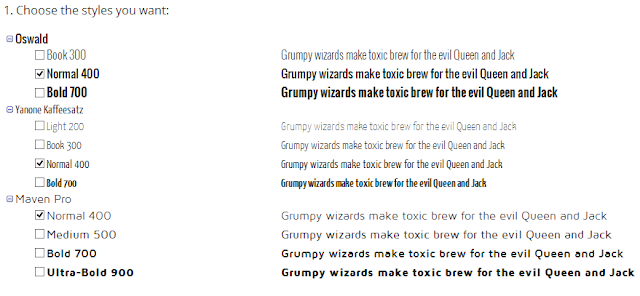
Custom FontsIn this post I am going to explain you how to add custom font style to blogger blog. Adding Custom Fonts to Blogger can improve the look and feel of your blog.
In your templates you can use any font you want, but these would be properly displayed only if the viewer has those fonts installed on his/her System.
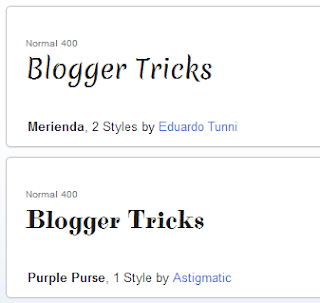
Font embedding Techniques allows you to use any font on your Blog and these fonts will be viewable to the viewers even if they don’t have the font installed on their Systems. Adding custom fonts to WordPress works in the same way. You will add the first piece of code between the head tags in your header file (WordPress does not require that extra slash at the end) and the second piece of code goes into your stylesheet. You can see a list of available Fonts at the Google Font Directory.

How To Add Custom Fonts To Your Blogger Blog


Font Settings

Google font Setting
Make Font Setting which your like.
By Default the Google API provides the Regular version of the Font. If you need specialised versions like  bold, italic or bold and italic,
Now to apply these fonts on your template, you can use these in your template CSS
For example you may use something like You will have to add a back slash "/" at the end of link and before > Closing.. look like this "/>"

Now you can add custom font style to your blogger

1. First we change our blog Headings font.
1. Go to your blogger Dashboard>> Template>> Proceed>> press CTRL+F and search this code. (how to find code using search bar)
Search The Following Code in your blogger Template CSS Section.

h1,h2,h3,h4,h5,h6 {
    font-size:100%;
    font-weight:400;
    font-family: 'HERE IS YOUR CUSTOM FONT NAME', serif;

Note:- If you cant find code look like this just leave comments.. I will try help you about finding code.
2. and Second we change our blog paragraph font.
Search The Following Code in your blogger Template CSS Section.
body {
 background: #FFF;
 color: #000;
 font-family: "HERE IS YOUR CUSTOM FONT NAME", sans-serif;
 font-size: 14px;
 line-height: 1.6;
 margin: 0 auto;
 padding: 0;
}

3. Change Sidebar Widgets Heading Font.
Search The Following Code in your blogger Template CSS Section.
#sidebar h2 {
text-transform: capitalize;
border-bottom: 1px solid #D3D3D3;
color: #404040; 
font-family: "HERE IS YOUR CUSTOM FONT NAME",  sans-serif;  
font-size: 2em;  
line-height: 1;  
font-weight: bold;  
padding-bottom: 10px;  
margin-bottom: 10px; }
4. Change Your blog Header (Blog Name) Font.
Search The Following Code in your blogger Template CSS Section.
#header h1 {
 letter-spacing: 0;
 margin: 0;
 padding: 0;
 font-family: "HERE IS YOUR CUSTOM FONT NAME", sans-serif;
 font-variant: small-caps;
 text-transform: none;
 font-weight: bold;
 color: #088A4B;
 font-size: 70px;
 line-height: 1.2;
 text-shadow: 3px 3px 3px #aaa;
}

Your Blog Headings. Like H2, H3, H4, as your wish. if you have any trouble about this tutorial leave your comment or questions below in comment box. Thanks for Reading our post.
Read Article →

0 comments
Table Screeen Shoot
In this post I am going to explain you how to add stylish table in blogger with CSS. Adding table In blogger post is very difficult  for blogger beginner users.The ability to create tables is a feature that is lacking in Blogger post editor. To add a table you not only have to know the required HTML tags, but also have to painstakingly construct the table by arranging the tags manually in post HTML.
You can add stylish table in your post by adding little CSS codes in you blogger Tamplate.


Step 1. First You Need Add CSS in your blogger Template.
Step 2. Add HTML Code in Your Post.
Note:- You Can Make Changes in style sheet.
Table Width, Headings Background, Borders, by changing color code in Table CSS. check out our Color Code Generator Tool.

Step 1.

Make sure you have your Template Backup. (how to make a template backup)
1. Go to your blogger Dashboard>> Template>> Proceed>> press CTRL+F and search this code. (how to find code using search bar)
]]></b:skin>
2. and Paste this CSS Code Before/above ]]></b:skin>
#customer
{
font-family:Maven Pro;
width:100%;
border-collapse:collapse;
}

#customer th 
{
font: Yanone Kaffeesatz;
font-size:1.2em;
text-align:center;
padding-top:5px;
padding-bottom:4px;
background-color:#3e3f3f;
color:#ffffff;
}


#customers
{
font-family: Maven Pro;
width:100%;
border-collapse:collapse;
}
#customers td 
{
font-size:16px;
border:1px solid #cd0237;
padding:3px 7px 2px 7px;
}
#customers th 
{
font-size:1.1em;
text-align:left;
border: 1px solid #cd0237;
padding-top:2px;
padding-bottom:2px;
background-color:#cd0237;
color:#ffffff;
}
#customers tr.alt td 
{
color:#000000;
background-color:#ffffff;
}

Click on preview button and see your blog live. if all Element view is correct like adding before Css then click on save.
you can Change Font style, Background, Border Color, Text Color, by changing highlighted Code.
Font: Red
Background: Green
Border: Orange
Table Text Color: Blue
That’s it your Table Style Sheet is Ready Before Doing This.

For More information about HTML and CSS
I am not professional in CSS or HTML but I have a little knowledge about that. I am not learn this languages professionally but when I reading online content daily so I am getting very useful knowledge about CSS and HTML. W3School  is the best website for learning CSS, HTML,  XML, JAVASCRIPT, VB, JQUERY, PHP and all  programming languages. you can learn all languages in free on w3school.com. me also HTML, CSS, XML on w3school.com. I hope this information useful for blogger new users which can’t have knowledge about this  Online Programming Languages School and I am very excited about this web becoz this is totally free.
If you have any trouble or question. Please leave your comments below in comment box. thanks for reading our post.
Read Article →

0 comments
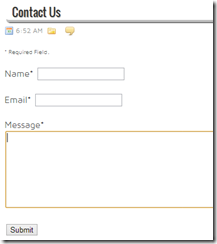
Contact Us Form Builder
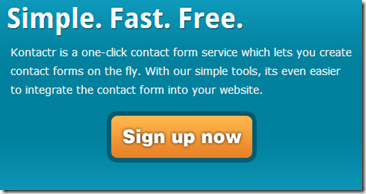
In this post I going to show you how to add contact form in your blog. contact forms enable readers to out blog to send us emails without having to knowing our email address to potential spammers. I am using Google docs contact form on my blog but Google docs form have not protection against spamming so decide to add kontactr free form to our blog. recently kontactr added captcha function to their forms which makes more protection against spamming. in kontactr form we also make change in form appearance which suite with our website or blog. in this tutorial I have a better way which can help blogger user about adding contact form and how to customize it. so lets start the tutorial.

Create your Kontactr account which is free of cost.

1. Go to Kontactr Website
Kontactr Signup
2. click on signup now button.
Kontactr Signup form
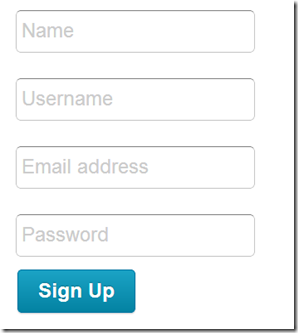
3. Fill the required fields. YOUR NAME, USERNAME, YOUR VALID EMAIL, PASSWORD and click on sign up button.
4. when you submit your signup request you need validate your free account before using kontactr contact form.
5. Go to your inbox and verify your ownership of kontactr free account.
6. once you verify your account login with your account and get your free contact form.
Note:- you can create only one contact form for each email account.
7. login with your username and password you can see windows like this. click on customize link and customize your contact form.
Contact form customization
8. change colors, Background color, text color, box text color, change these colors with your blogger template color. and get form code below Ajax widget  which I showing above.
and now time to add contact to your blog. go to your blogger dashboard>> pages>> new page and choose black page for text or media.
Steps
Html Area
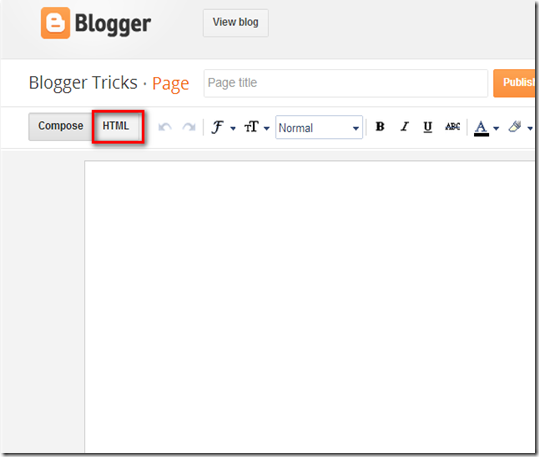
9. copy the Ajax widget code and paste in blogger html tab. and click on preview if preview is looking good then click on save and enjoy your free contact form.
the details used to submit the contact form will emailed to the address which you used for signup. and kontactr cant save any of your personnel data. and I am very excited with kontactr free simple form offer. thanks for reading our post if you have a any trouble with doing this….
plz leave your comment and below in comment.
Read Article →

2 comments
2012-11-30_030207
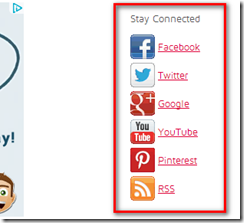
in this post I am going to show you how you add Simple Stay Connected Icons below post title. you can align this widget vertically and horizontally below your post title like our blog and I will try to help you customize the icons in this tutorial. With this widget you can increase the traffic of your blog.and I am also using this widget  on my blog.
if you have any trouble with this tutorial post your comments and questions below in comment box. lets start the adding add this beautiful simple follow me widget.

1. Go to AddThis Official Website.
2. and create a free account using your email address.
3. after sign up login with you username and password.
4. Click on Get the Code button like showing below.
Get Code
5. click on Follow button options.
Follow Buttons
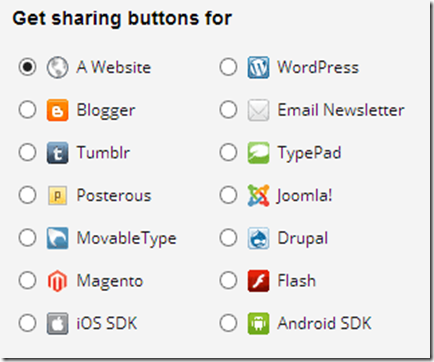
6. Select buttons for a website.
Follow me widget
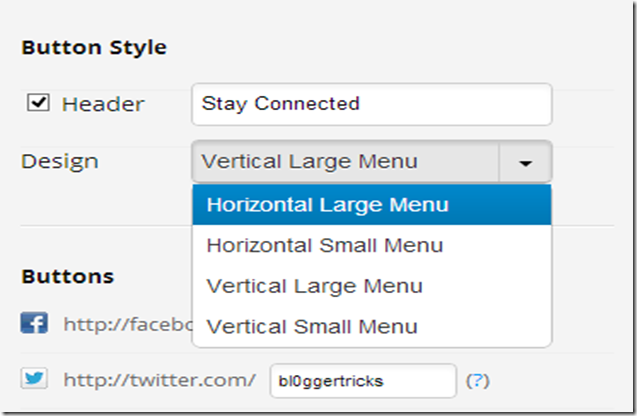
7. select your buttons style Horizontal Large, Horizontal Small, Vertical Large and Vertical Small which one you like.
2012-11-30_031318
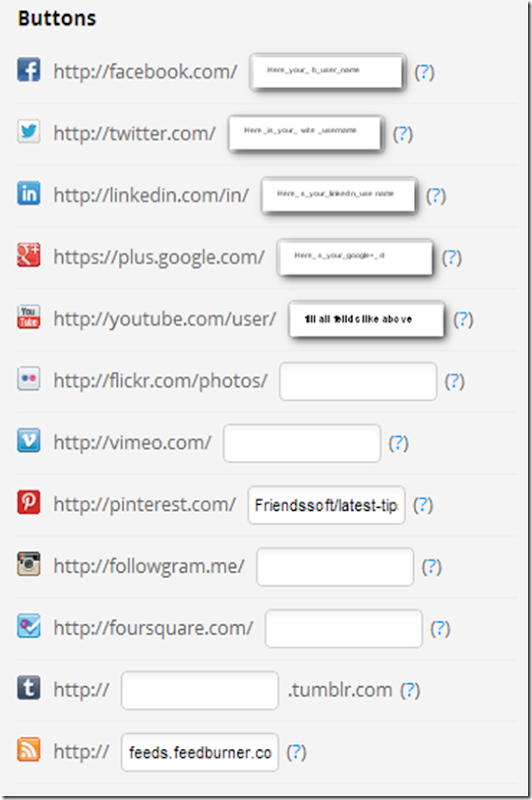
8. type your username in fields which buttons you want appear in widgets.
2012-11-30_032052
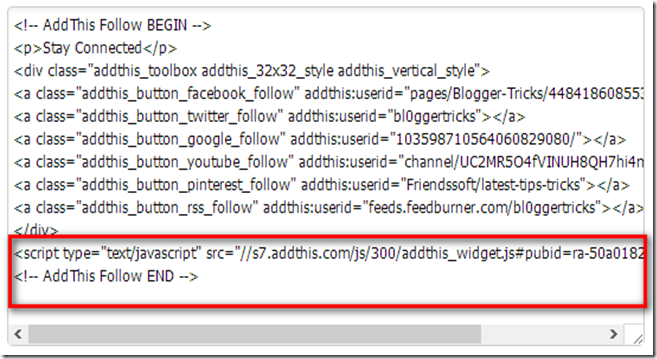
9. copy the generated script which highlighted below.
addthis widget code
and now time to edit your blog template make your template backup if any mistake in editing (how to make a template backup)
10. Go to your blogger Dashboard>> Template>> Proceed and click on expand widgets. press CTRL+F and find this code. (how to find code using search bar )
</head>
11. and paste addthis widget script before/above </head>.
addthis widget code1

12. copy the html code which I highlight above and go back your blogger template.
and find this peace of code.
<div class='post-header-line-1'>
13. and paste copied html code after/below “<div class='post-header-line-1'>” and click save you can also see video tutorial below about this tip. thanks for reading our post. leave comment and question below in comment box.
Read Article →

10 comments
Google-Adsense
In this post I am going to show how to put AdSense after post title and after post and make handsome earning from AdSense ads. this helps to keep your content neat and clean. AdSense ads also place any where in your blog page. but if you want look professional so you just add ad unit some places of your blog. to add AdSense first you need to create a ad unit using your AdSense account and I just hope you guys know how to create ad unit using AdSense account. if you don’t know don’t worry follow the instruction below. and if you have any trouble plz leave your comments below I will try give you better idea.

How to Put AdSense after post title

  1. Go To your AdSense account.
  2. Then My ads.
  3. and click new ad unit.
  4. Just follow the simple instructions to create Ad unit or link unit.
now you when your ads code is ready copy and save in notepad with working folder.
and time to edit your blogger template and before editing make your template backup ( how to make a template Backup)
Step 1. Go to your blogger Dashboard>> Template>> proceed>> and click on expand widgets also ( press CTRL+F for search code in your template)
and find this peace of code. (how to find code using Search bar)
<div class='post-header-line-1'>
</div>
or this.
<div class='post-header-line-1'/>
Step 2. and replace with below code.
<div class='post-header-line-1'>
<!—YOUR ADSENSE PARSED CODE HERE—>
</div>
you can parsed AdSense code with our HTML EnCoder. Just parse your AdSense code and paste below post header line 1.
and click save that’s it your done.
Note:- if you want to show ads only post page read our post, (widget only home page, post pages or Static Page.)

How to put AdSense after ending post

Step 1. Go to your blogger Dashboard>> Template>> proceed>> and click on expand widgets also ( press CTRL+F for search code in your template)
and find this peace of code. (how to find code using Search bar)
<data:post.body/>
Step 2. just paste AdSense parsed code below “<data:post.body/>”
parse your AdSense code with our HTML EnCoder available for download.
if you have any question post below in comment sections. thanks for reading our post.
Read Article →

2 comments
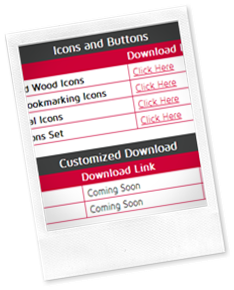
Icons Preview
Today I am sharing with you Glossy style Social bookmarking icon Set. this icons specially for which have Simple Background blogs. you can use this icons for personal and commercial projects.  This icon set available in 2 formats. .CDR .PNG if your are know about Corel draw so you can edit this yourself and you can convert it in any format psd, eps, ai, and jpg unlimited size. This is my fourth post for bookmarking icons. check out my previous post, wood style icons, circle style icons. and Nail Style Icons Set.


Icons Pack Detail!
in this icon pack you can found these icons. 9rules, blogger, blogger2, co.mments, delicious, designfloat, digg, facebook, flicker, flicke2, friend star, furl, google, google2, last.fm, linkedin, mail, mixx, my space, netvibes, newsvine, newsvine2, picasa, pownce, reddit, rss, stumbleupon, technorati, twitter, vimeo, wordpress, yahoo, youtube in new style, pintrest, and many more. in my next icons post I am sharing with you more attractive icons, and with editable cdr format. you can edit file any time in Corel Draw if you have a knowledge about working in linework.
if you like my post plz leave your comment and share with your friends.

Icons Preview
Note:- you can open .cdr only in Corel Draw Newest Version.
You Can also download these icons from download section.

Download

Thanks for Reading My Post. Happy Blogging ( Stay Mast Stay Cool My |ife My Ru|z Thumbs up)
Read Article →

11 comments

Meta DescriptionIn this post I going to show how to add meta description and keywords to your blog. Meta tags is a important things for  Search Engine Optimization. improving your search engine rank is key to success your blog. The <meta> tag provides metadata about the HTML document. Metadata will not be displayed on the page, but will be machine parsable. Meta elements are typically used to specify page description, keywords, author of the document, last modified, and other metadata. The metadata can be used by browsers (how to display content or reload page), search engines (keywords), or other web services.


Tips and Notes

Note: <meta> tags always goes inside the <head> element.

Note: Metadata is always passed as name/value pairs.

Note: The content attribute MUST be defined if the name or the http-equiv attribute is defined. if none of these are defined, the content attribute CANNOT be defined.

But you can take control !
You can add Meta Tags and Description to your blog. So lets see the tutorial below.

First you must copy the code below and add a meta description and meta keywords as follows:

<meta content='text/html; charset=utf-8' http-equiv='Content-Type'/>      <meta content='PUT BLOG DISCRIPTION HERE.' name='description'/>

<meta content='PUT, KEYWORDS, HERE, SEPERATED, BY, COMMA,' name='keywords'/>

For Example Check out my meta description and keywords.

<meta content='text/html; charset=utf-8' http-equiv='Content-Type'/>
<meta content='Find Blogger Widgets, Blogger Gadgets, Blogging tips, Social icons pack, cdr file, psd file, png, jpg, Plugins and Learn SEO to Optimize Your Blog.' name='description'/>
<meta content='Widgets for Blogger,bloggertricks,bloggingtips,social,icons,cdr,png,psd,downloadbuttons, makemoneyonline' name='keywords'/>

Now time add code to your blog.

1. Go to your blogger Dashboard > template > click on proceed button and find this code. how to find code in template with browser Search bar.

<head>

2. add the content code below <head> section and click save that’s it your done.

If you have a any question leave your comments below in comment section.

Read Article →

7 comments

Remove Subscirbe to Post AtomIn this post I am going to show you how you can remove the subscribe to posts atom from your blog. which you can see below your comment form. this link is always irritating me for showing my blog professional.

I was just wondering if there is a code on how to remove the feed link at the bottom of a post, the one which says Post (Atom). Without affecting anything.

and finally I found this piece of code and remove it from my template I want share this tips on my blog if any hate this link this help us to remove this link from blog.  you can remove this just in two steps its very easy. lets see the tricks below.


Note:- before editing template always make a backup your template see here how to make template backup.

1. Go to your blogger Dashboard> Template > click on proceed buttons > click expand widget box.

2. Press CTRL+F and find these lines in your template. how to find code in template with Search 

<b:if cond='data:blog.pageType != "item"'> <!-- Blog feed links -->
<b:if cond='data:feedLinks'>
<div class='blog-feeds'>
<b:include data='feedLinks' name='feedLinksBody'/>
</div>
</b:if>

3. Remove the highlighted code which I showing you above and press save button

That’s it your done! if you have a question about finding this code in your template leave your comments below I hope I can help you. thanks for reading my post. Happy blogging

Read Article →